


You'll also need
- A piece of stiff disposable board to hold your Clear Photo Film at an angle while you drip inks down it. Cardboard works well.
- A craft blade, straight edge, and cutting surface, or sharp scissors to cut your drip strips
- Paper towels
Please save, share, and follow us:
YouTube Channel Pinterest Facebook Instagram
You can make one-of-a-kind pieces using this easy technique and the best resin jewelry supplies. DO THIS FIRST PART OUTSIDE. This is a super fun project, but a bit messy and you don't want to be breathing in alcohol ink fumes.
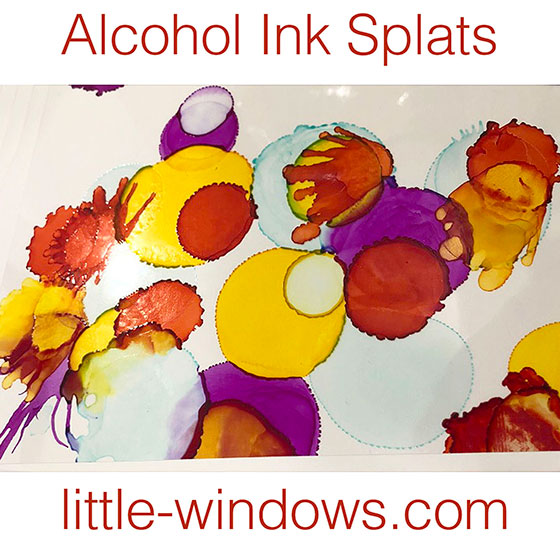
Our Clear Photo Film bonds strongly to alcohol inks, so you can drip them, spatter them, or blob them on in any pattern you like. Then, cut the sheet apart and cast it in resin and it won't bleed, run, or chip off. You can use any alcohol inks and mix brands if you want. I prefer Marabu Inks, click above to order these beautiful resin colorants.
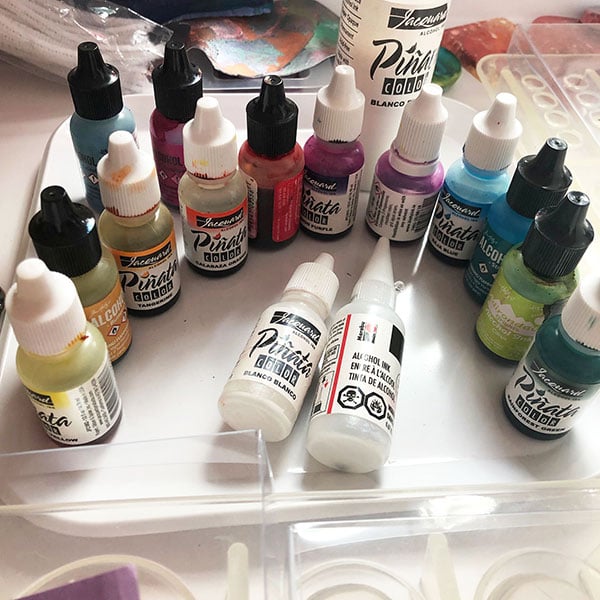
First, you'll tape your Clear Photo Film to a disposable sheet of something (cardboard works well). Then, start dripping inks across the surface. For a bit more opacity drip white ink first, then color inks along side/on top. You can create drippy rivulets, splats, blobs, or watercolor effects with this technique. You'll need to allow your drip sheets to dry completely before you mix any resin. I'd leave them overnight just in case so all moisture can evaporate.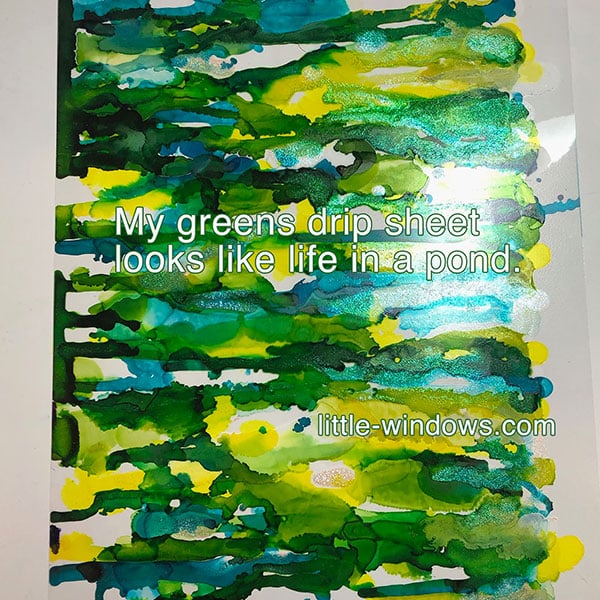
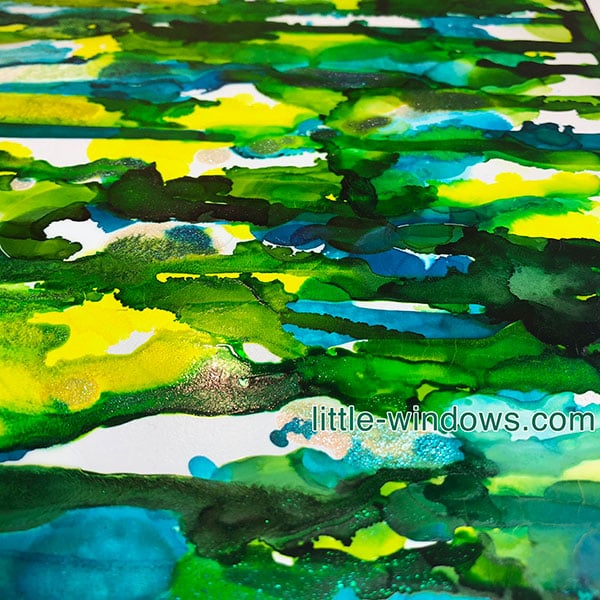
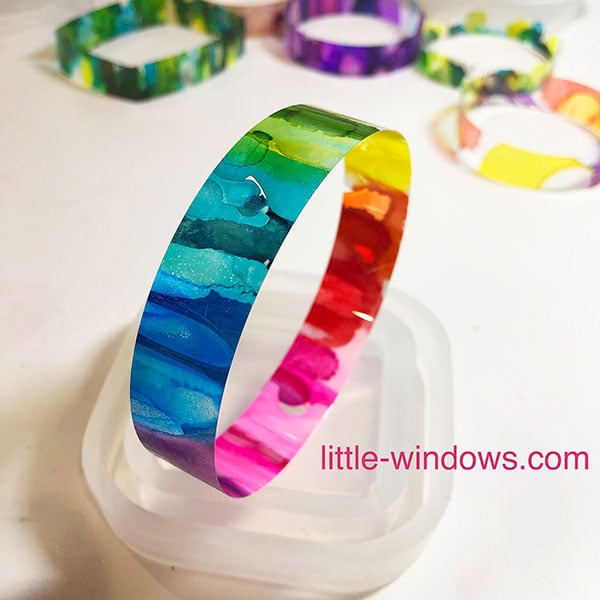
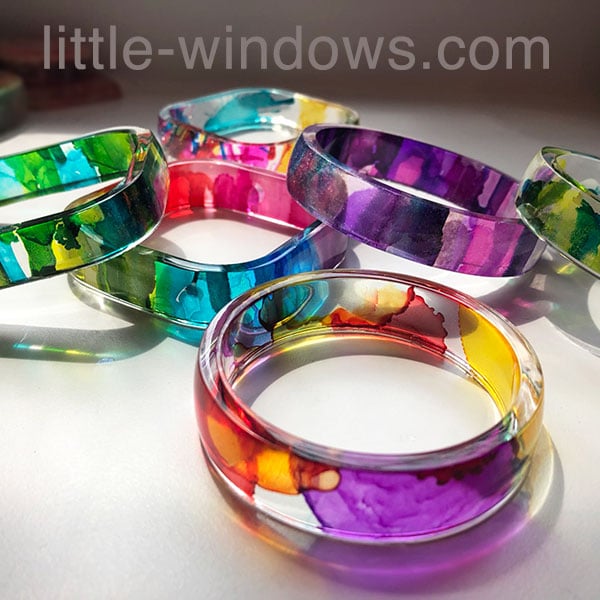
Here's a close up of the piece. I've got lots of juicy parts to choose from!
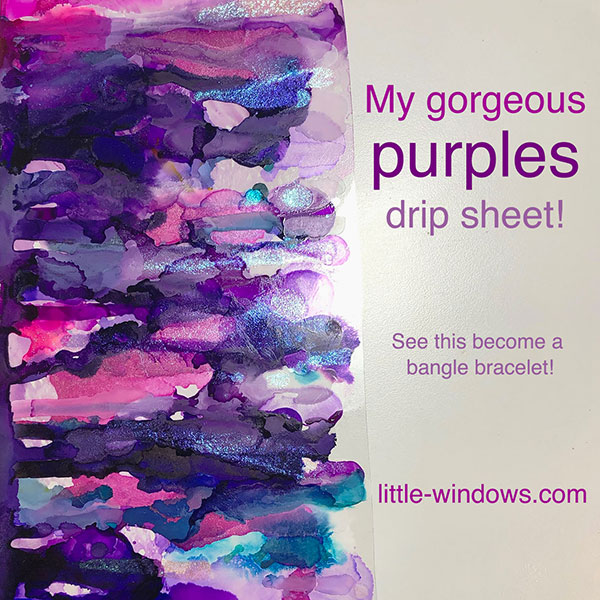
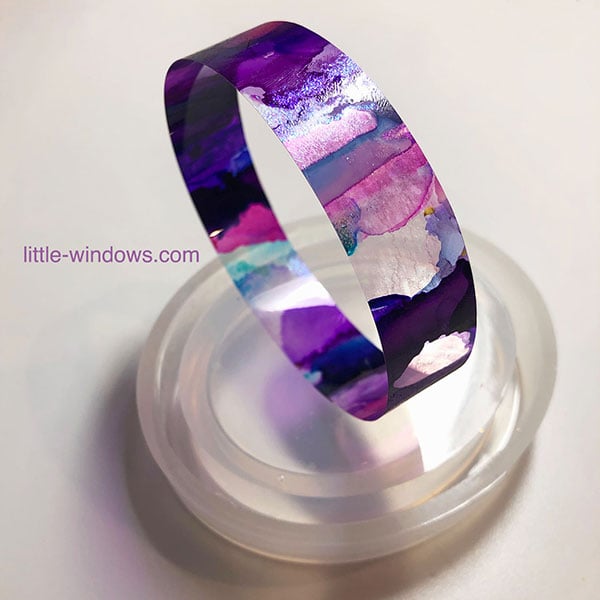
Here's a close up of my dreamy purples sheet.

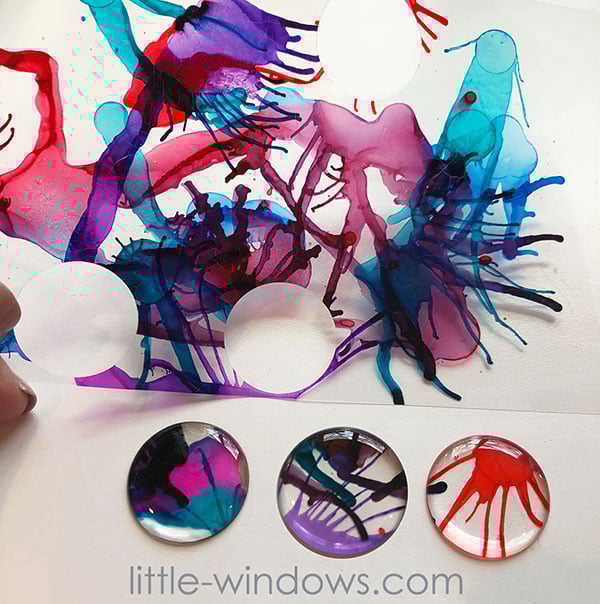
Here's one I did by dripping straight down, instead of letting the inks run down the Clear Photo Film. I blew through a straw to spread out the color and create these tendrils/phalanges/tentacles.
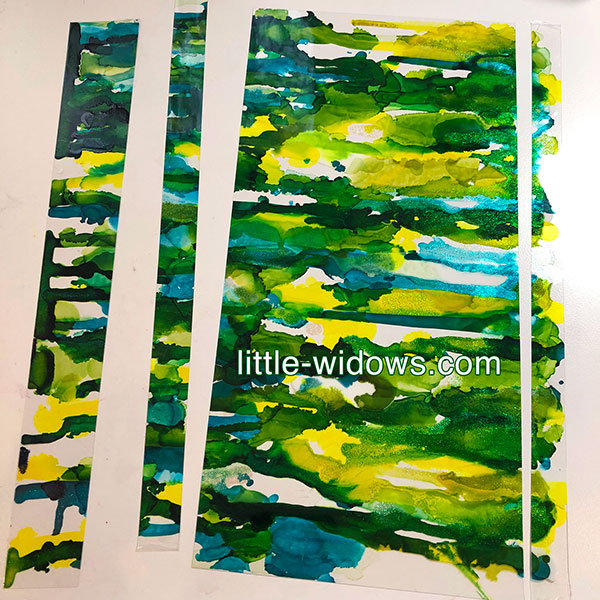
Use 2 sheets of paper to decide which part of your sheet you want to appear in your castings. Move them around until you like what you see.
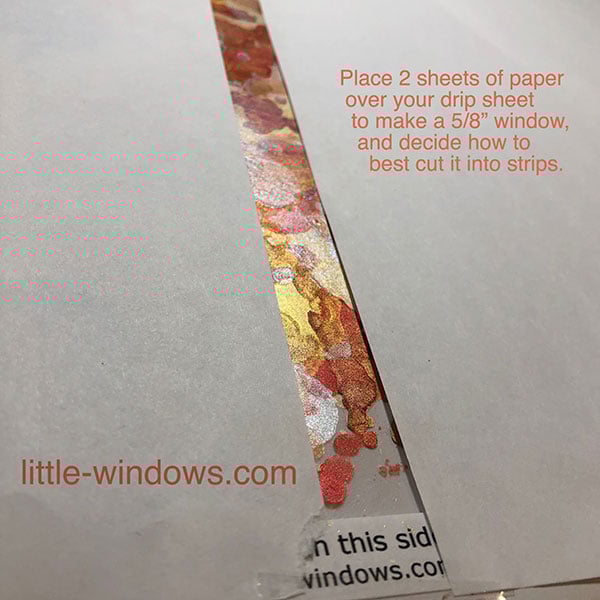
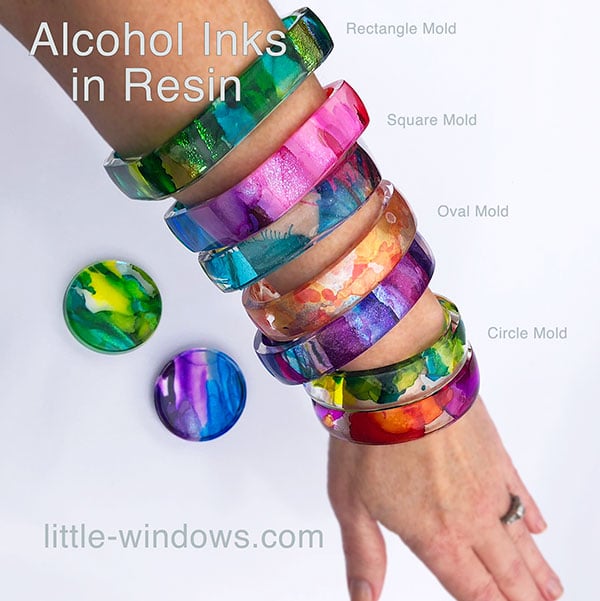
Strips will need to be 5/8" (19mm) to fit in our Double Sided Bangle Molds.
The Maker Guide that comes with each of our Double Sided Molds includes a sizing guide. Cut strips to the length you need, based on the shape of mold you want to use.
Pretty strips will be even prettier in resin!
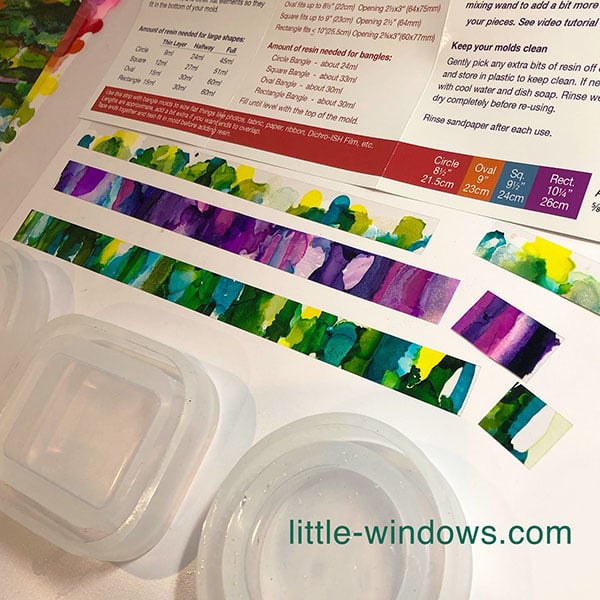
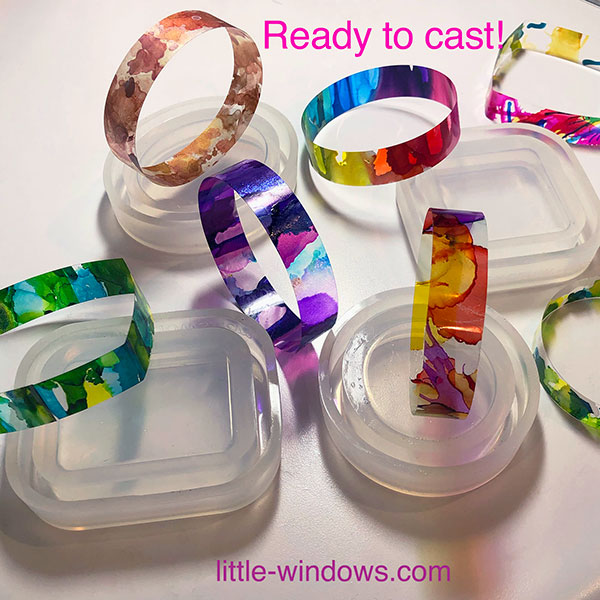
We're ready to cast these pretties!
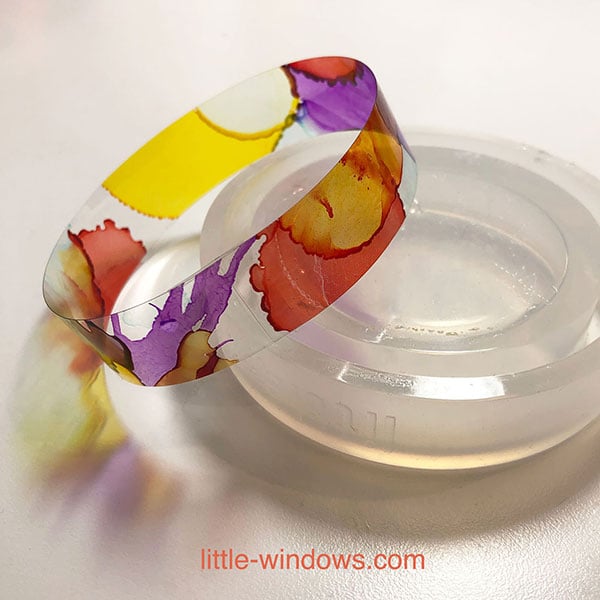
Here they are! These make me so happy, even stacked on my dresser they're light-catching marvels.
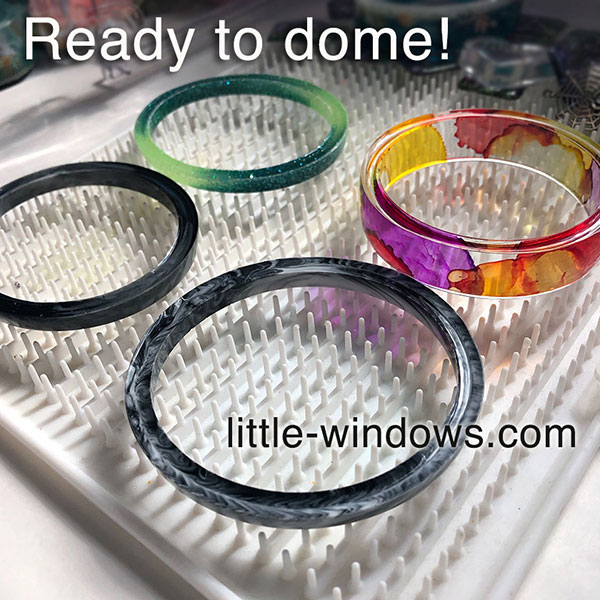
If you don't fill your mold to the top (or if you're intentionally making skinny bangles), you may have a dip in the top edge. Make sure the resin is even all around. If not, trim it or use the sandpaper that comes with your mold. Then place it on your Large Silicone Doming Tray, and dome up the top with a small amount of Brilliant Resin for a smooth, professional finish.
You can also cut out shapes and dome them.
MORE IDEAS using the same awesome products:


