


You'll also need
- Washi Tape with metallic accents, metallic trim tape, die-cut stickers, if desired. These are widely available in lots of patterns.
- Tweezers
- Sharp scissors
- Charms to embed
- Jewelry findings - jump rings, clasps, chains, earwires, etc
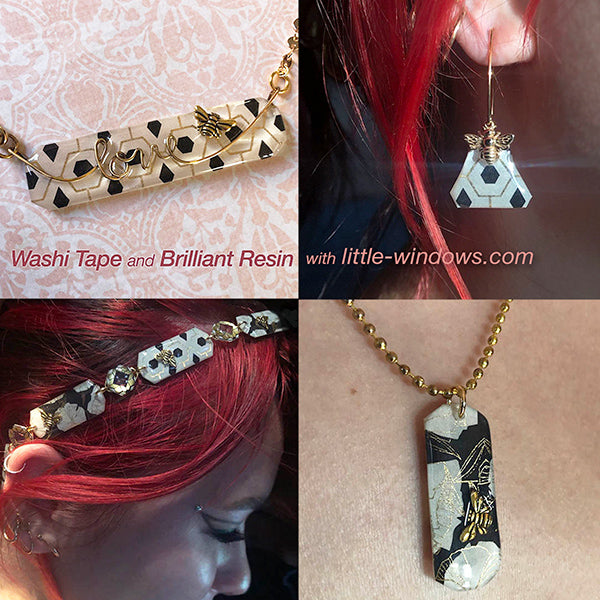
This is a wonderful way to turn inexpensive materials into beautiful jewelry. The video tutorial covers both Doming and Casting, this post focuses on the Doming Projects.
Washi Tape is a decorative paper tape that is translucent, repositionable, and waterproof. It's very thin and floppy and if you try to apply resin directly it will curl.
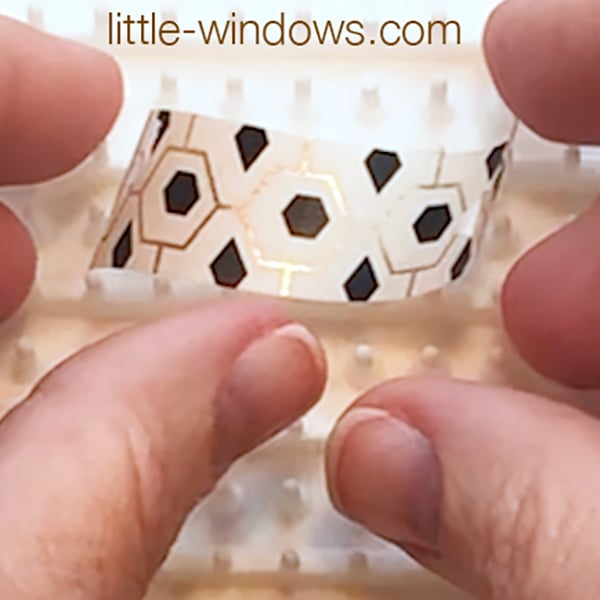
You'll need to stiffen it first by sticking strips back-to-back, or sticking it down to a sheet of Clear Photo Film and cutting shapes. This way works well as the tape will retain its translucency.
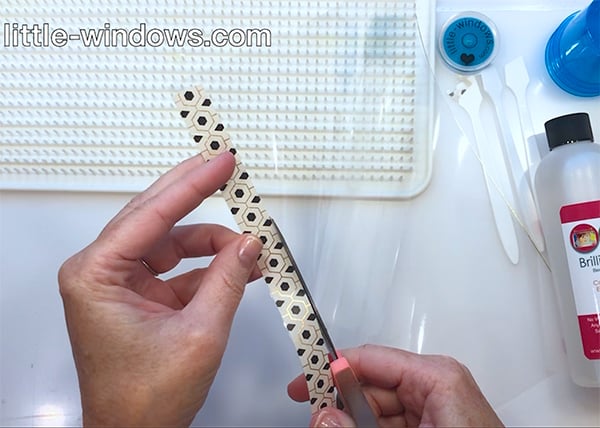
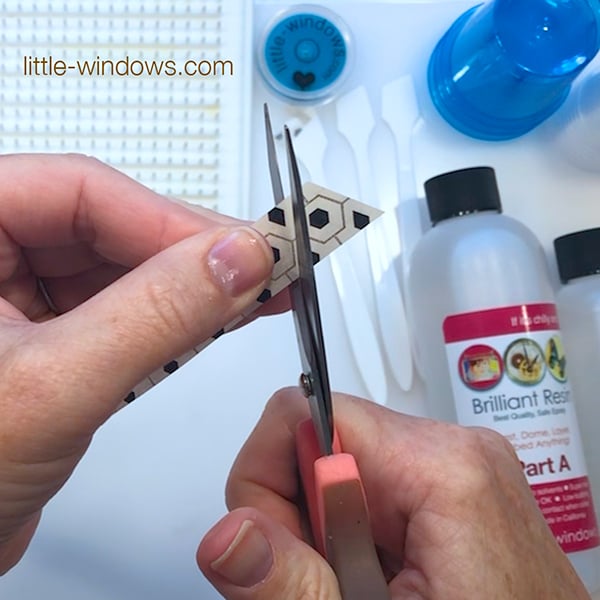
Make sure the corners are a bit rounded, place your stiffened shapes on your Large Silicone Doming Tray, and apply Brilliant Resin with your Mixing Wand.
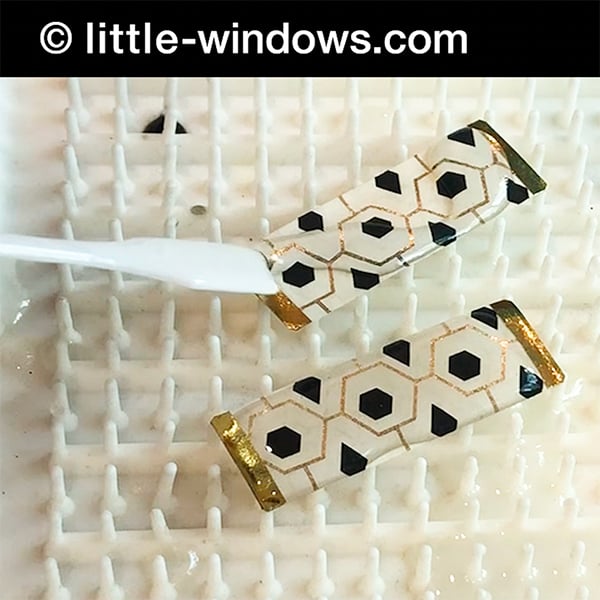
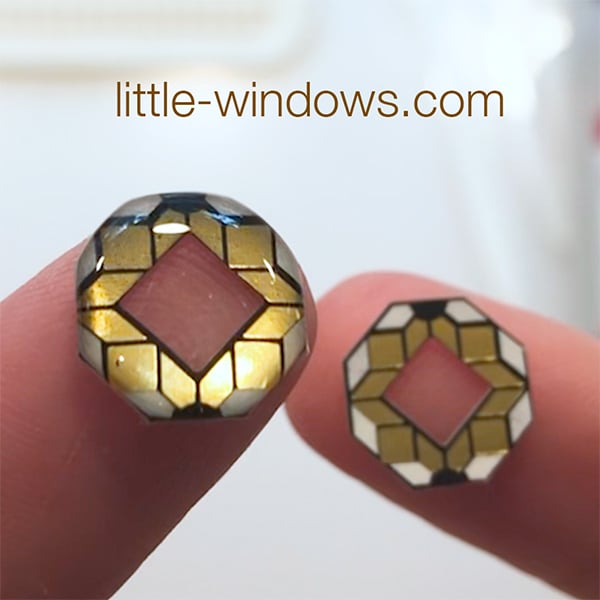
Look how shiny and beautiful these are! Brilliant Resin really brings out the metallic accents.
Here's a 1-minute version of the Doming Technique used above, please share and save!
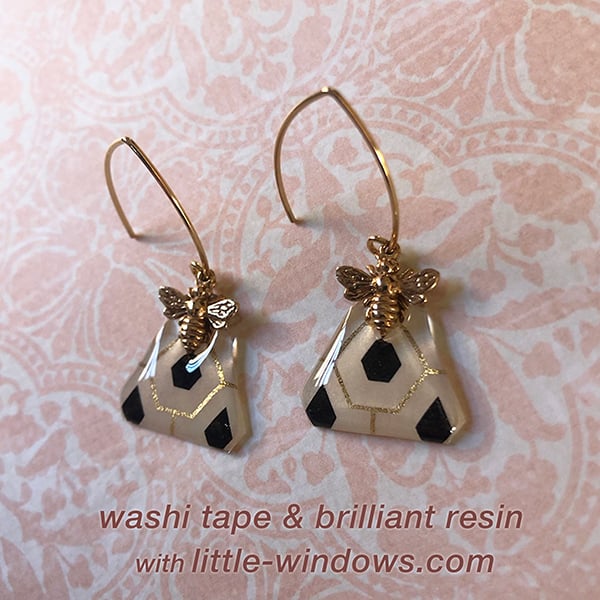
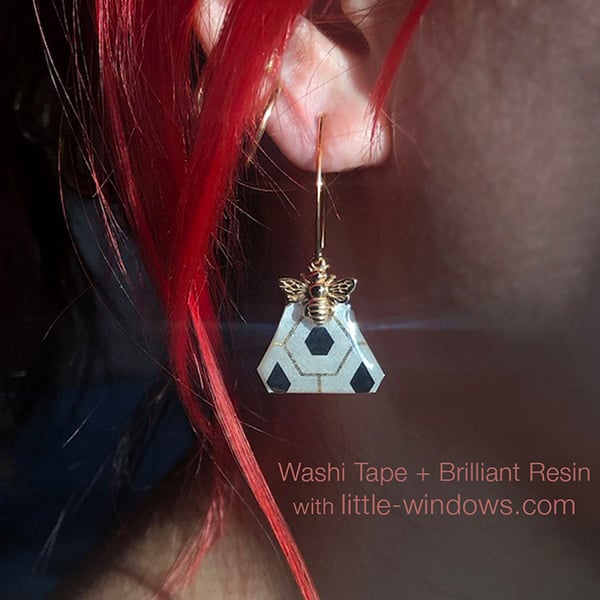
Here are some projects I made with this technique, on these earrings I let my resin thicken up for about 1-1/2 hours, then pressed the bee charms in, creating a ripple effect that catches the light.
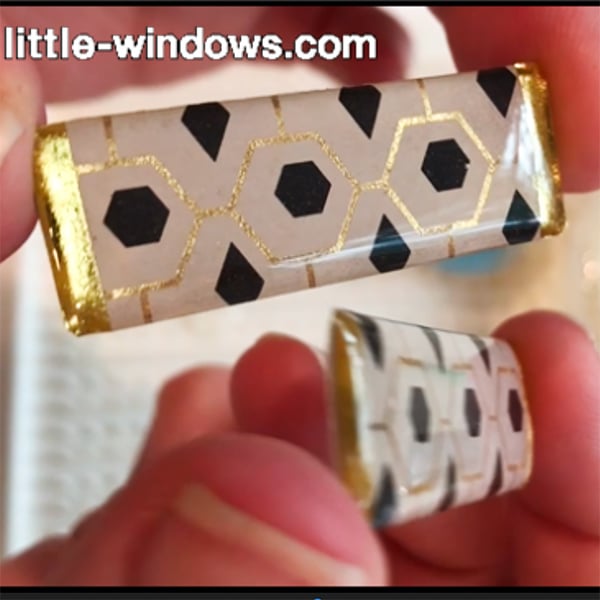
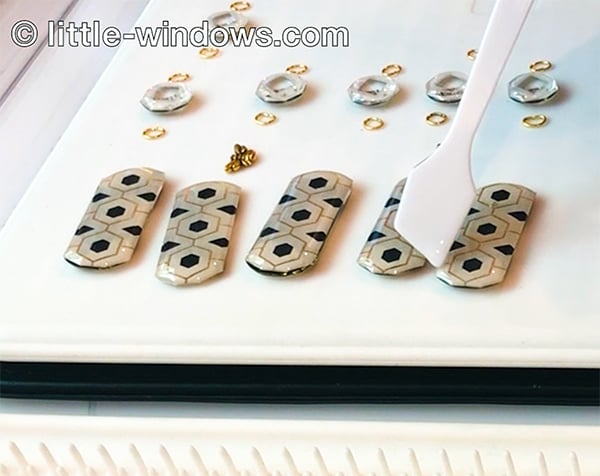
I used my strip of double-sided Washi Tape and some thick die-cut stickers to make this next piece.

It only takes 2-3 drops of Brilliant Resin to turn this paper bit into a beautiful connector.
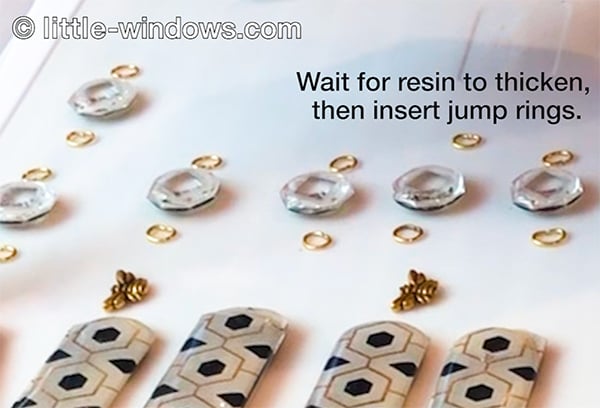
Here I'm domig the second side of my segments, I will let the resin set up for about 30-45 minutes, then insert my bee charms.
I will press the jumprings into the resin on both sides of each connector, so I need the resin to be nice and thick so it'll hold them in place. For this I'll wait 1-1/2-2 hours, then use tweezers to insert the jumprings with their openings facing in.
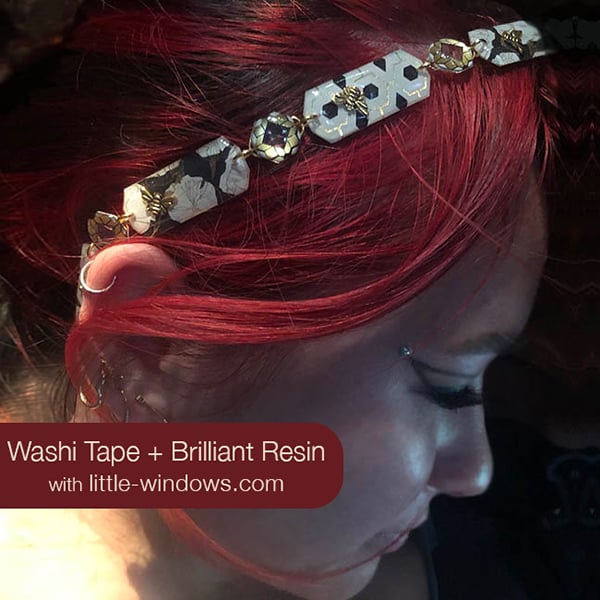
I drilled through both sides of the larger segments, and used larger jumprings to connect the pieces together.

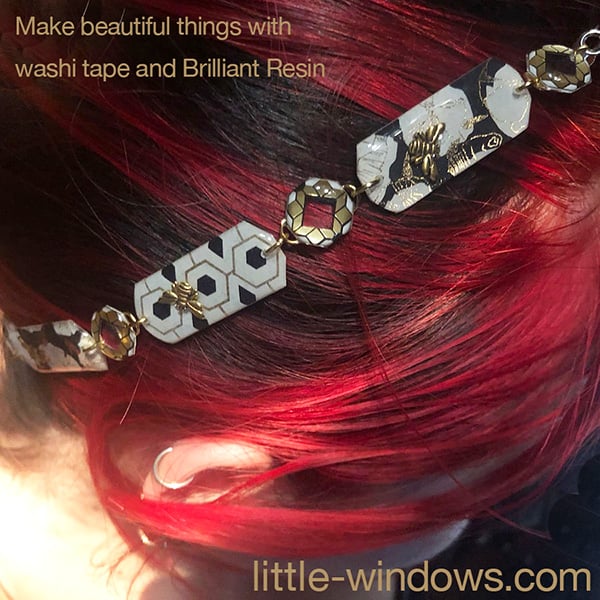
Here's the finished beauty! In making this tutorial I had 2 sets, so I made one into a bracelet and the other into a hairband by adding a strip of elastic to the ends.
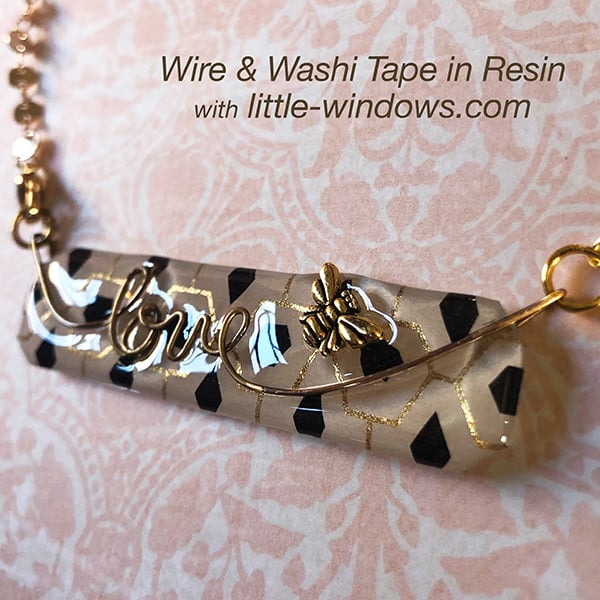
On this piece I shaped wire to create the word love, and to also act as corner bails for this necklace.
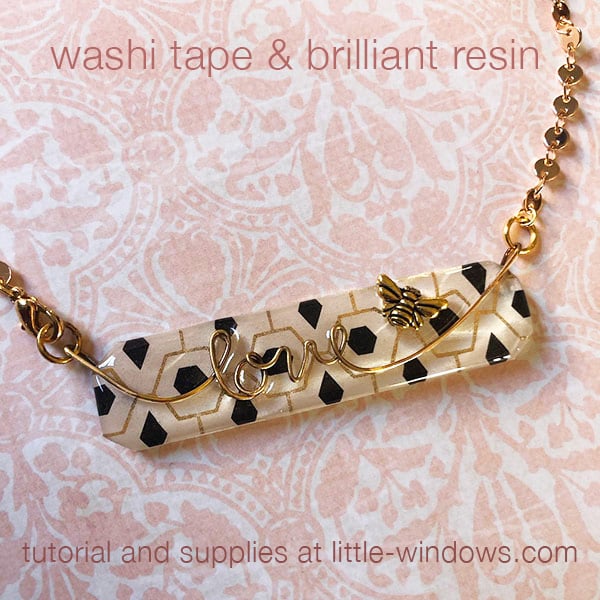
I wanted a dramatic ripple effect so I let the resin set up for 2 hours before inserting the wire and my bee charm.
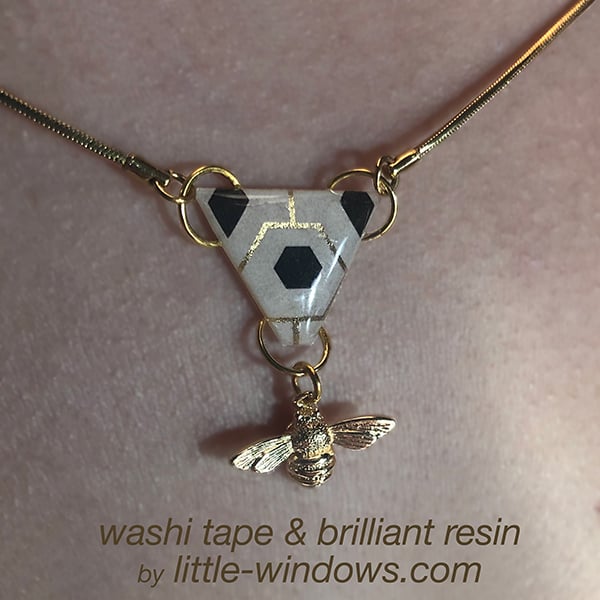
Here's another necklace made the same way as the connectors above!
MORE IDEAS using the same awesome products:


