


You'll also need
- Photos resized to fit the molds you're using. See below for resizing guide.
- Inkjet printer (if you don't have one, we offer Pro Printing, just email your photos and we'll optimize and print them for you)
- Alcohol Inks - colors and white. CLICK HERE to see the ones I use
- Sharp scissors
- Paper towels
Please save, share, and follow us:
YouTube Channel Pinterest Facebook Instagram
Step-by-step demos in the video above, here are some basics and project shots:
![]()
Next step is to insert your photo silhouette. Printing on the Special Photo Paper for Resin means you won't have to seal your photos before embedding them in resin. Since we are working upside-down in these projects and can't see if there is air trapped under our photos, I recommend putting a piece of clear packing tape on the front of the photo before cutting it out. This creates a slippery surface that lets bubbles squish out around the edges more easily. You'll see this in the video above.
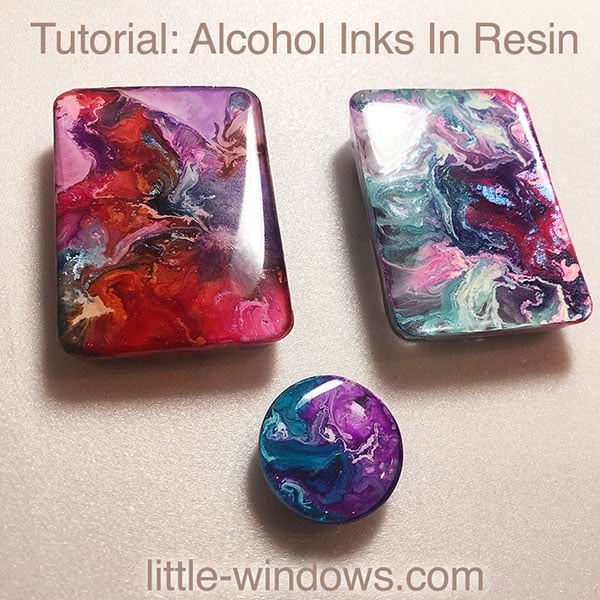
Let that layer set up, then pour another layer a bit thicker. Drip your chosen colors of alcohol ink into the resin, followed by white alcohol ink which causes them to sink.
Here's what it'll look like from the back as the colors drop and move.

Allow your castings to set up for at least 12 hours before demolding, here's the front side of this piece.

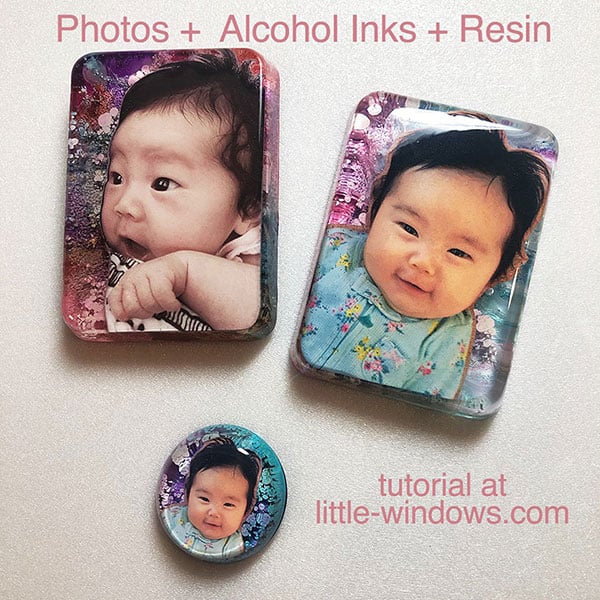
Another front-shot of more cutie projects:
Here are the back sides of these castings, they're so pretty!
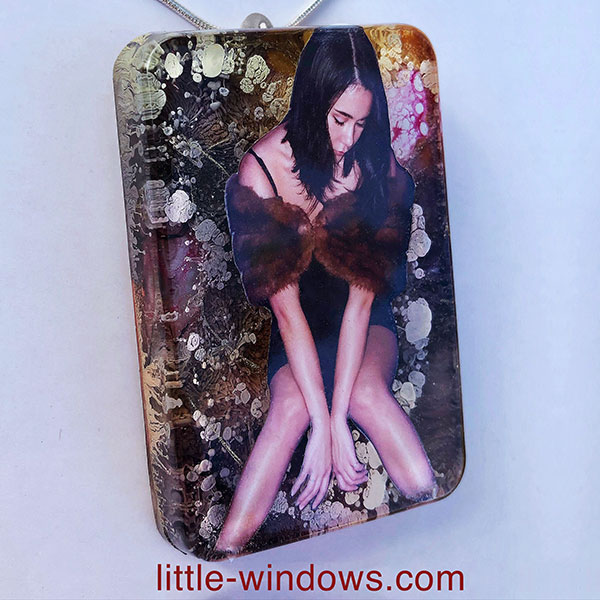
Here's a moody one I made that's now an ornament:
Here's a helpful guide for projects like these: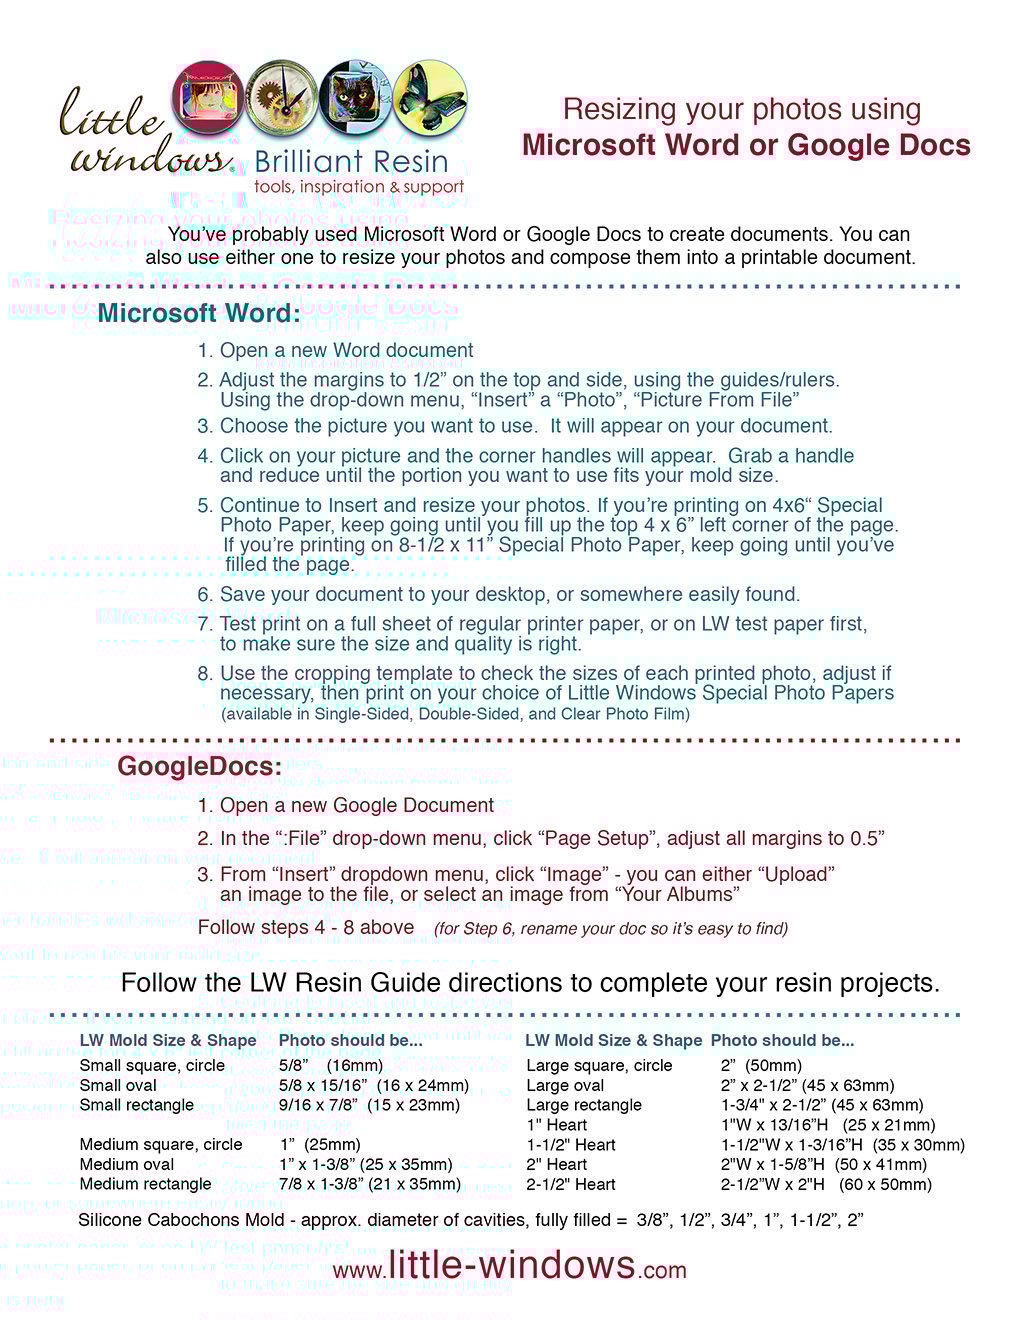
MORE IDEAS using the same awesome products:


