


You'll also need
Whatever elements you'd like to layer behind your photos. Here's what I used:
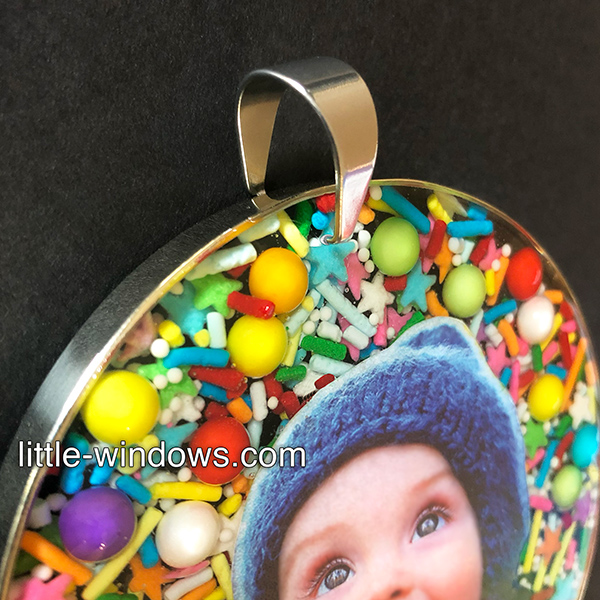
If you want to create ornaments you can drill shallow holes on each side and attach these JUMBO PINCH BAILS
This video has a how-to for 2 different layered resin projects, both feature cut-out silhouettes of our favorite things over decorative bits. These photos were printed on our Special Photo Paper for Resin, so they do not need to be sealed before resining. Use this technique for many different creations!
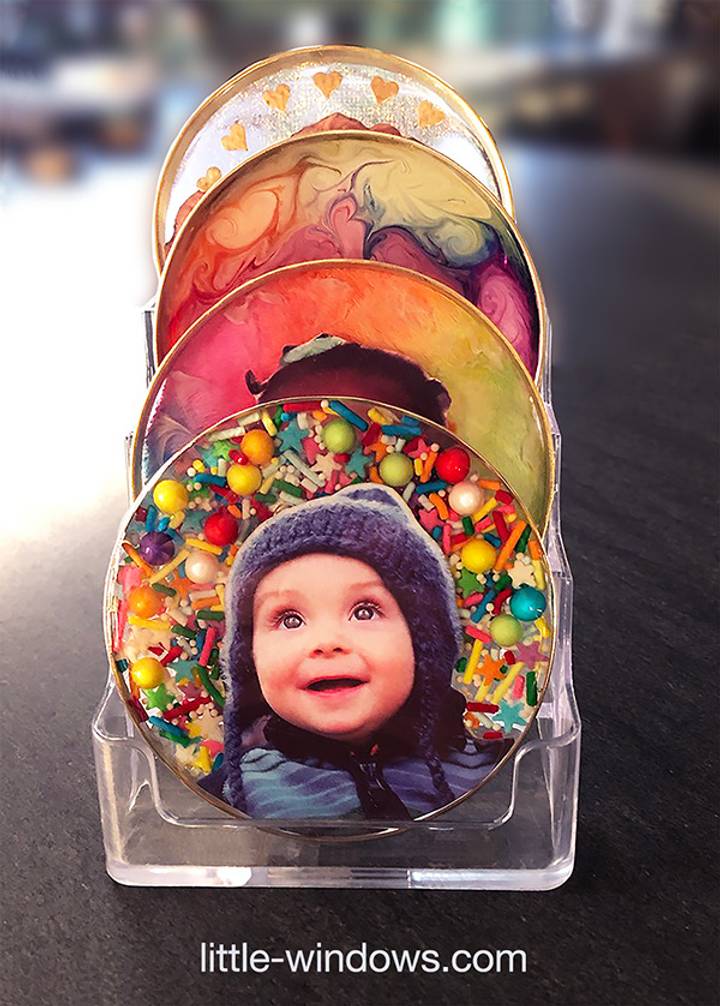
Rainbow candy sprinkles seemed the perfect accent to this cutie photo.
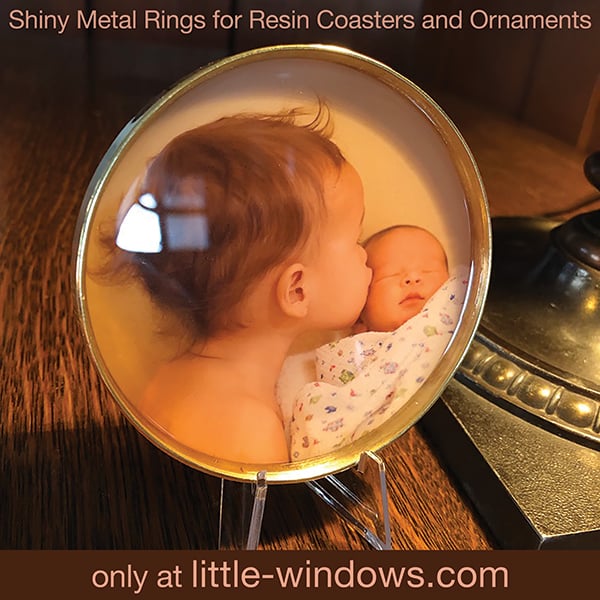
You can prop this on a little stand, or add a JUMBO Pinch Bail and hang it as an ornament.
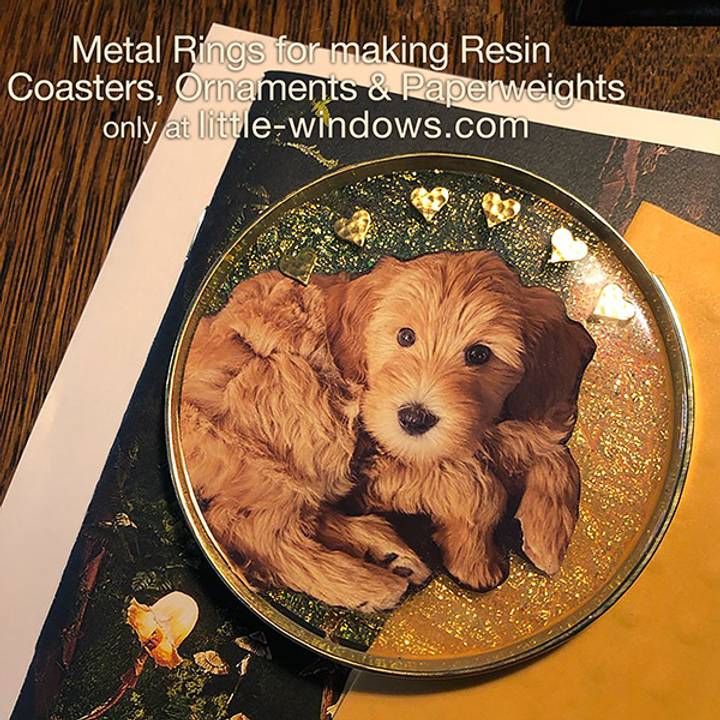
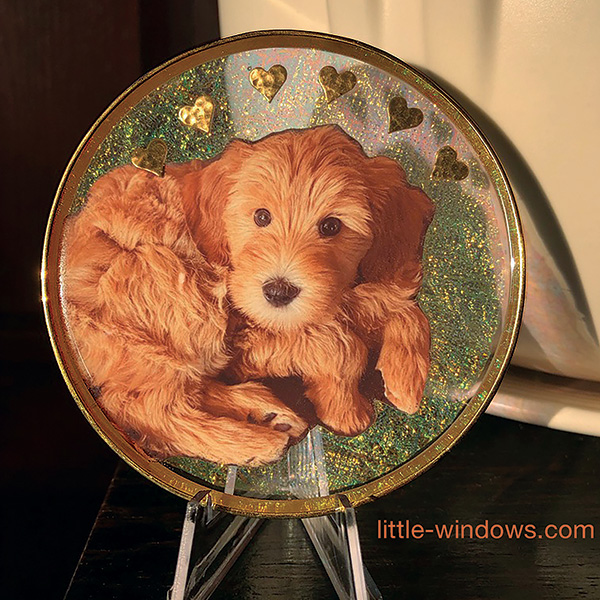
And Texture Film with tiny hammered metal hearts work well with our fur baby's photo.

This one can be used as an ornament too, who wouldn't want that cutie face staring at you?! It looks quite a bit different when photographed in the daytime, with sunny skies and the translucent film that makes the hearts look like they're floating.
You can also make these with just photos.
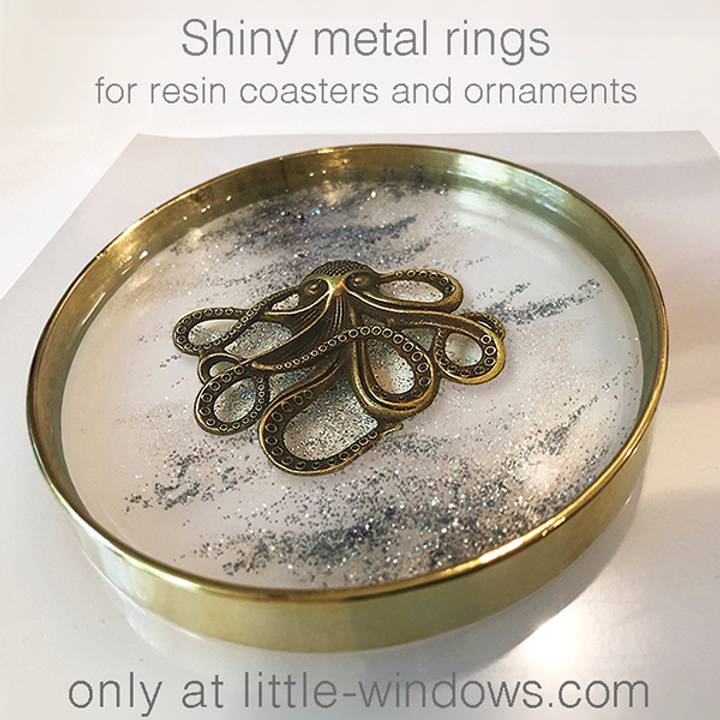
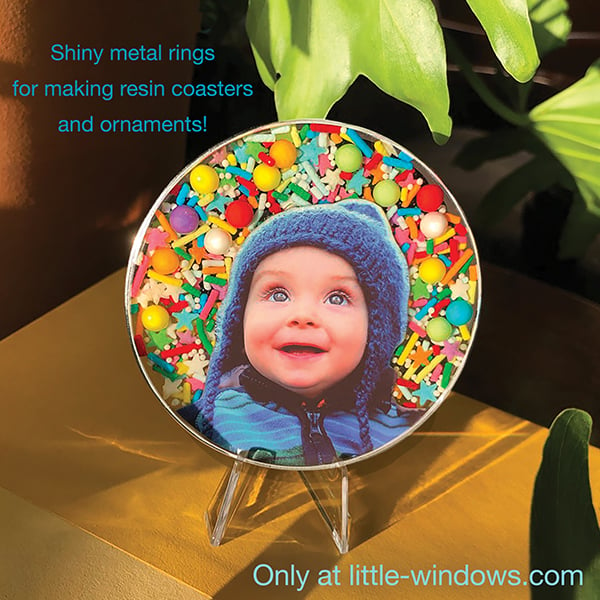
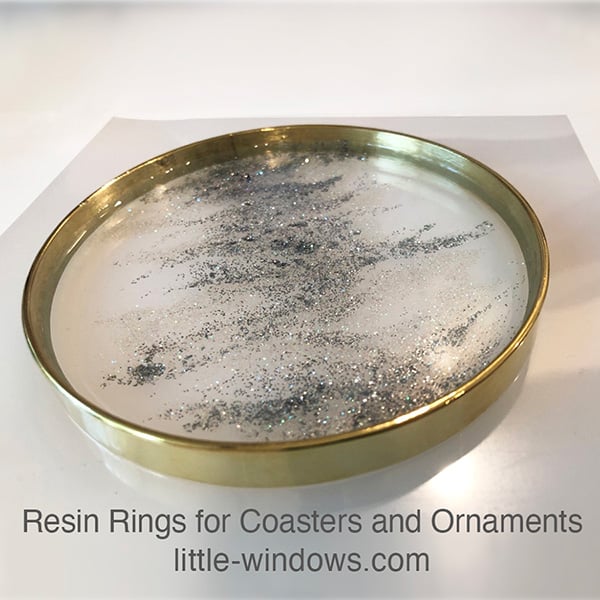
For this coaster I secured one of our metal Resin Rings for Coasters and Ornaments on a sheet of backer film, poured a layer of Brilliant Resin about 1/3 - 1/2 way up, allowed that to thicken for about 30 minutes, then added silver and opalescent glitter with my mixing wand, drawing it out from the center.
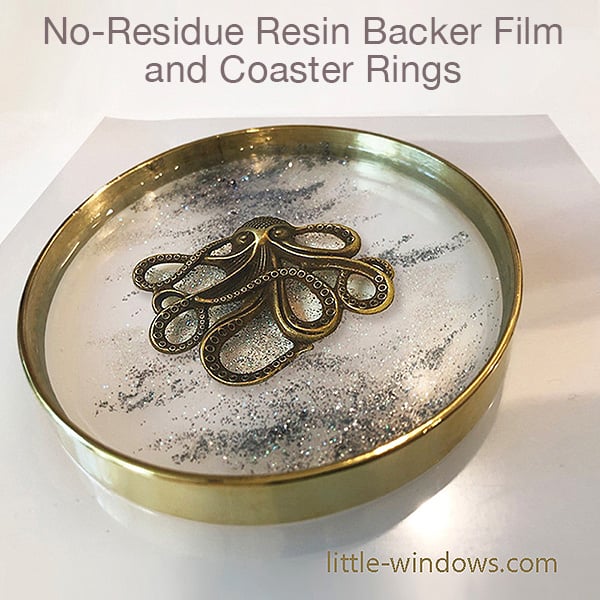
Once the first layer had cured, I poured another clear layer of Brilliant Resin, added the metal octopus piece, then filled the piece to the top with Brilliant Resin. This can be used for a decorative desk piece, as an ornament, or as a coaster
For more project ideas and a thorough tutorial, see this post.
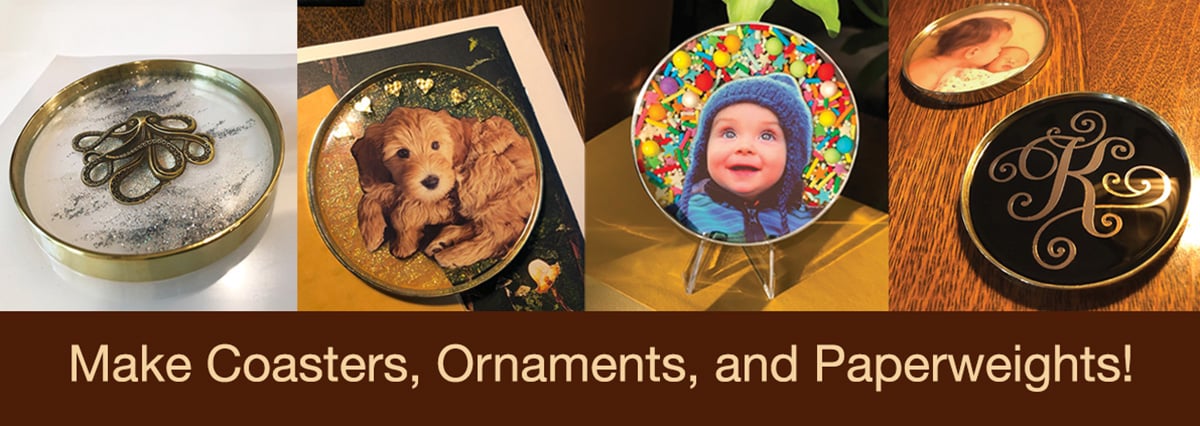
MORE IDEAS using the same awesome products:
