


You'll also need
- Digital images of the eyes you want to use, and an inkjet printer. You can use the guide below to resize your images using GoogleDocs or MS Word.
- Sharp Scissors
- Optional - having a circles template with lots of sizes, like this one, makes it easier to trace and cut out your photos
- Paper towels
Please save, share, and follow us:
YouTube Channel Pinterest Facebook Instagram
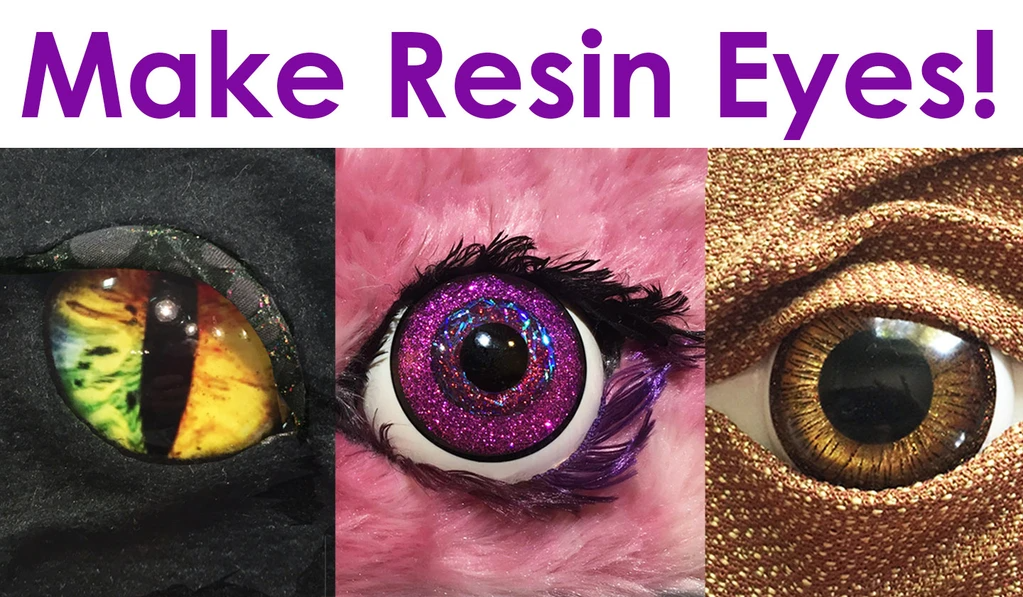
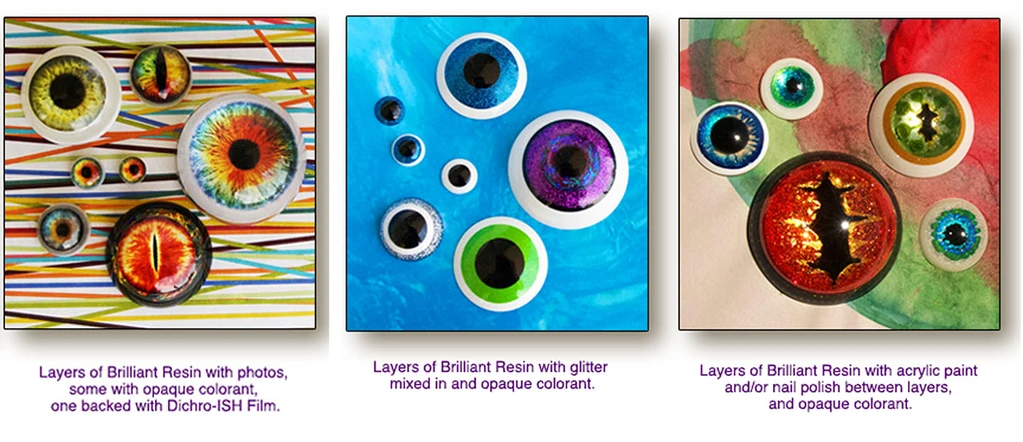
I am sooooo hooked on making resin eyes. I've found 4 ways to do it (the 3 ways above + Petri irises with alcohol inks), each has its uses. All of them were made with our Brilliant Resin and Silicone Cabochons Mold, and all require layers of resin, so leave yourself at least 4-6 hours between each layer for set-up.
![]()
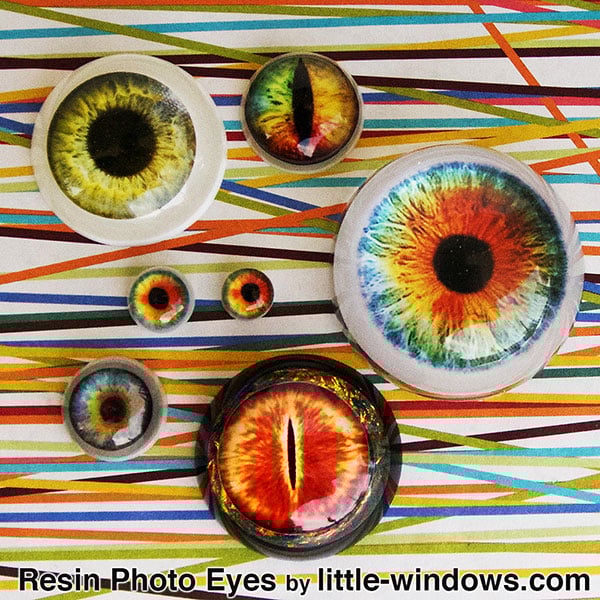
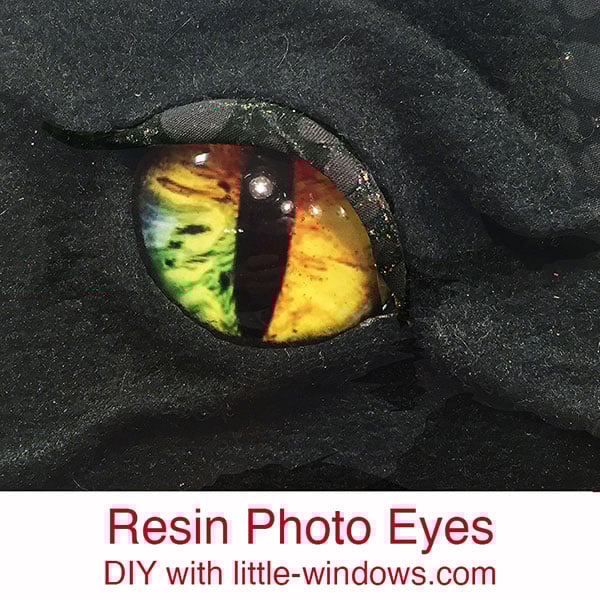
Creating Realistic or Fantasy eyes with Photos
You can print images of eyes onto our Special Photo Paper for Resin with any inkjet printer, and embed them in resin without having to seal the paper. For these we poured a clear layer of resin about the same size as the iris cut-out, and let it set up. Then we poured another thin layer of resin and pushed our eye print down onto the hardened layer below, to squish out any trapped bubbles. It's best to fill the mold about half-way, so the eyeballs aren't too domed.
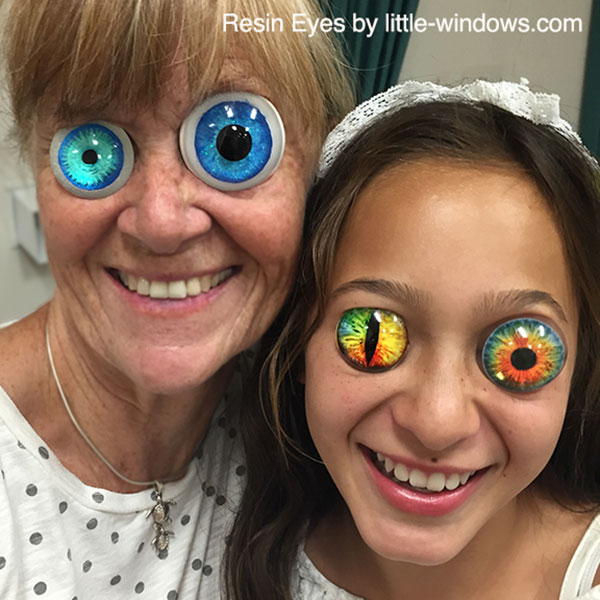
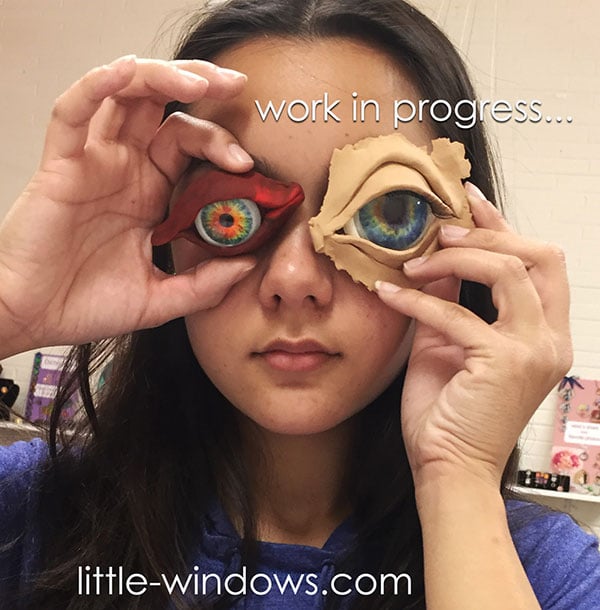
My silly family will now demonstrate the proportions of 2 out of the 6 sizes of cabochons included in our Silicone Cabochons Mold:
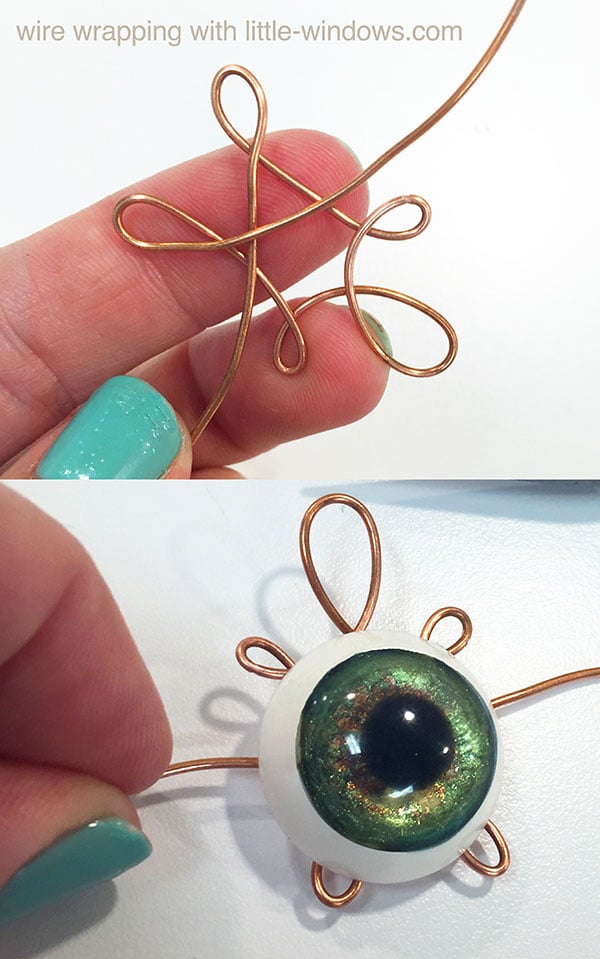
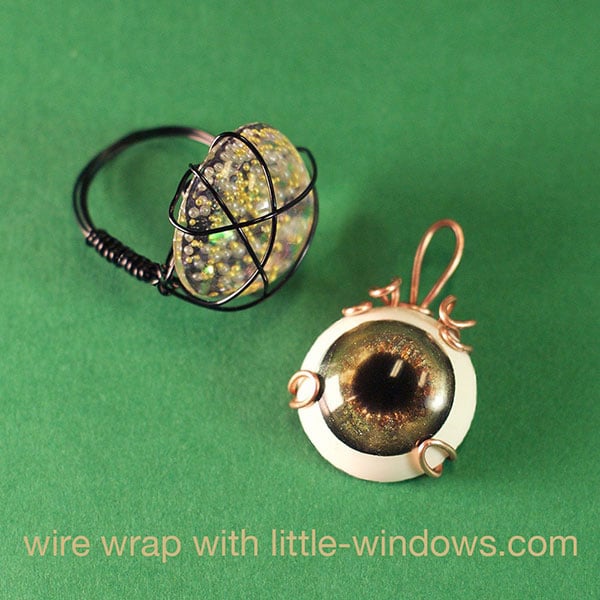
You can turn them into jewelry by drilling and adding findings, or wire-wrapping them into place like this:
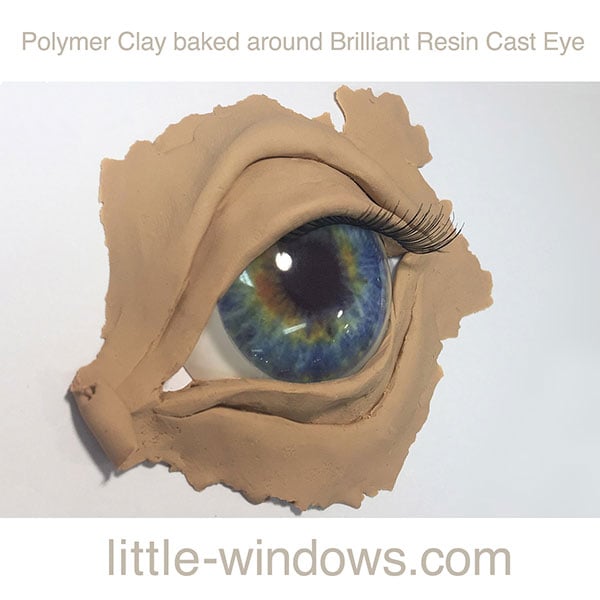
This one was printed on our Clear Photo Film, and surrounded with POLYMER CLAY and some fake eyelashes!
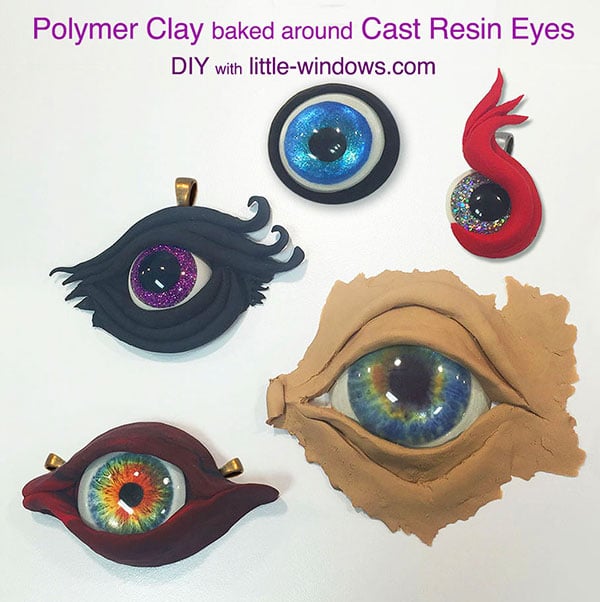
You can also incorporate these into costumes, book covers, or stuffies by wrapping fabric, fur, or leather around them.
Here is a thorough tutorial for using your Silicone Cabochons Mold, with lots more project ideas:
MORE IDEAS using the same awesome products:


