


You'll also need
- Depending on what you want to make, you'll want to get some...
- Sharp scissors
- Paper towels
Please save, share, and follow us:
YouTube Channel Pinterest Facebook Instagram
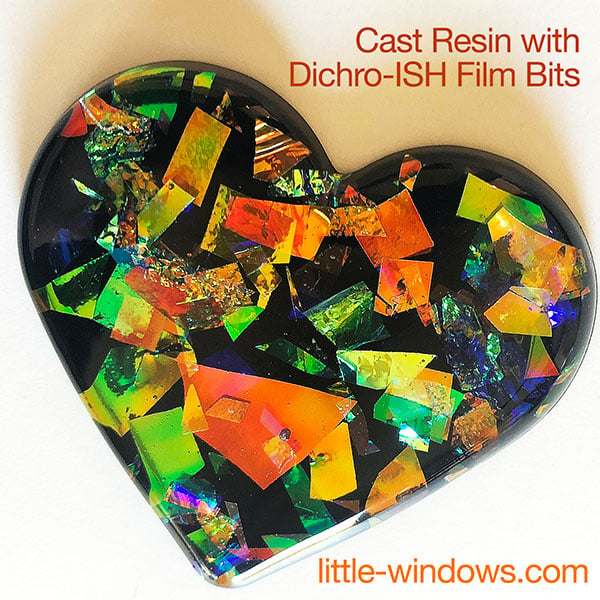
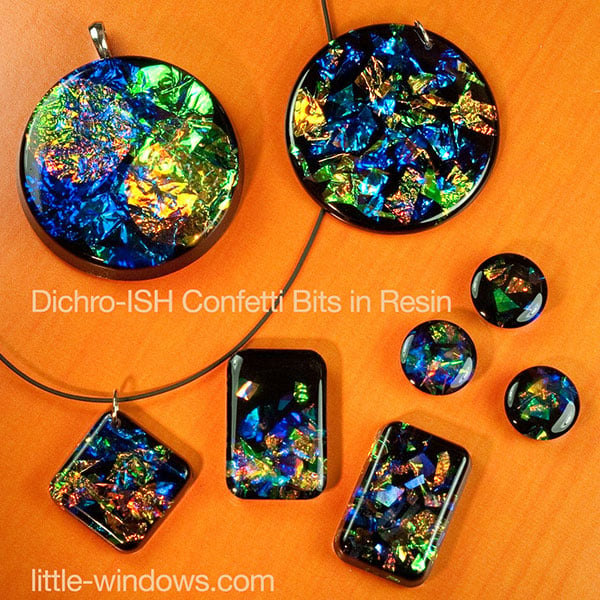
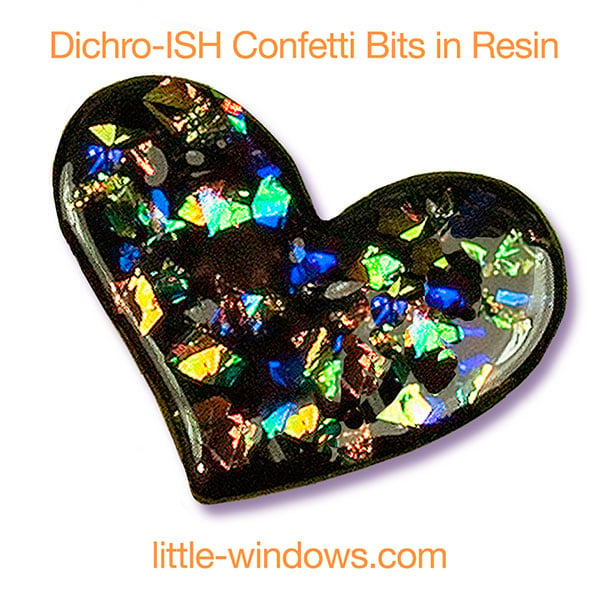
You can snip your Dichro-ISH Films into tiny bits and use them like confetti. With these films, it's best to put a layer of Black Resin (Brilliant Resin + a few drops of Black Resin Colorant) behind them so the shifting colors show well.
When casting in molds, you can either start with a thin layer of black resin, then add one or more clear layers with your bits, or start with clear resin and your bits, then demold and Dome Up with black resin for a smooth finish.
These buttons were done the same way, then I drilled them after demolding. Since Brilliant Resin doesn't get brittle, you can drill these even a year later and they won't crack.
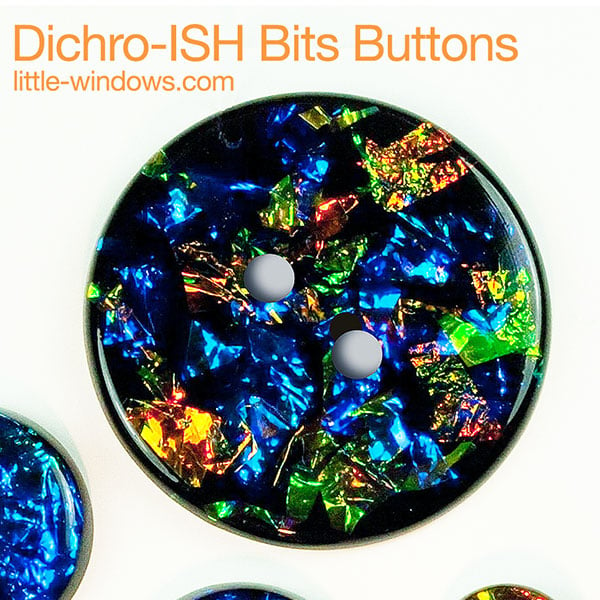
To finish you can drill them, glue a bail on the back, or add magnets.
When doming, you'll need to double-up your Dichro-ISH Films as they are too flimsy to hold the resin flat with just 1 layer. You can also attach them to Clear Photo Film with Double-Sided Adhesive Sheets before cutting your shapes. Either way gives the piece stability to hold the doming resin. You can dome the clear side or the black side first, whichever works best with your process.
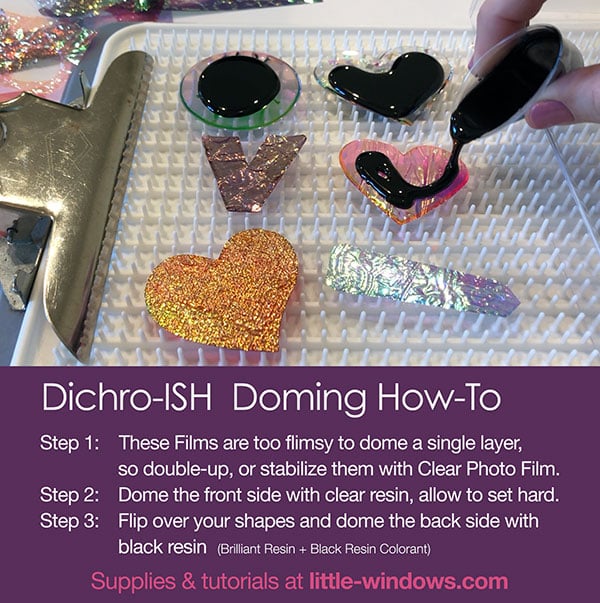
Here's how a domed piece will look when finished. It's thinner than a cast piece, and can be any shape you want. Try to avoid sharp points when doming pieces by trimming any sharp corners before doming.
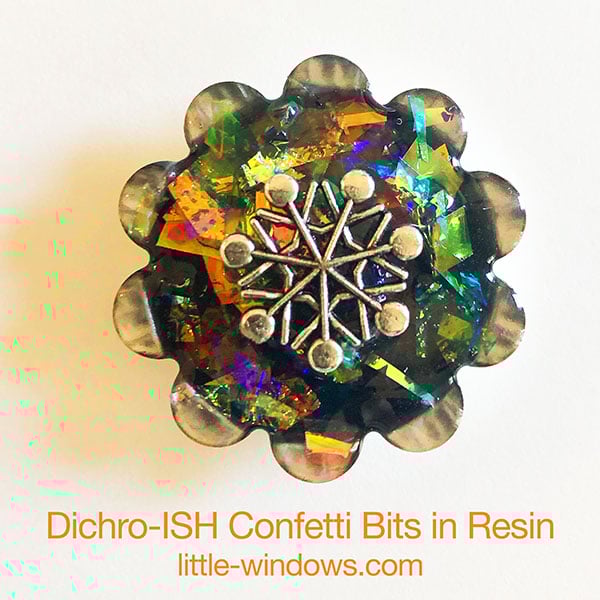
With this bottlecap bezel, I started with a thin layer of black resin, then mixed a bunch of Dichro-ISH Film bits into my clear resin and poured that gloppy mix into the bezel. I let it set for 1-1/2 - 2 hours, then placed the metal charm on top. It was still sticky but the charm didn't sink because the resin had thickened up.
MORE IDEAS using the same awesome products:
