


You'll also need
- Concentric metal rings, mine are from Nunn Design but you can find them from others, see dimensions below.
- Jewelry findings - 2-1/2" long headpins with round heads, necklace chain, or whatever you need
- Pliers, small sharp scissors or an X-acto Knife, and tweezers
Please save, share, and follow us:
YouTube Channel Pinterest Facebook Instagram
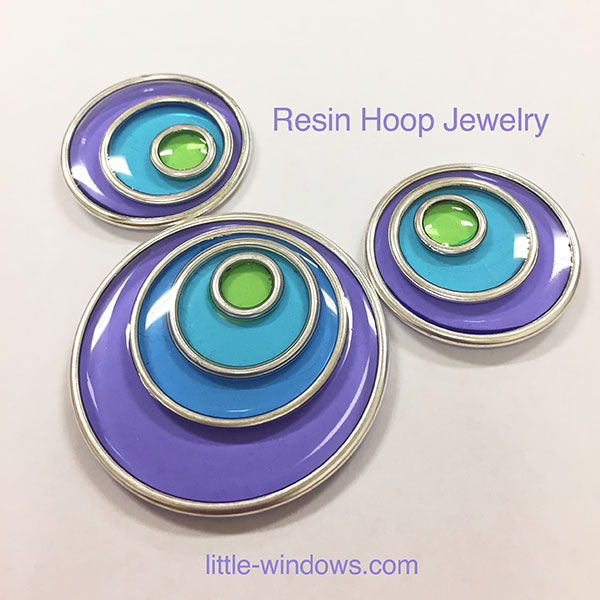
Becky at Nunn Design sent me some of their Open Frame Hoops to play with, and boy are these fun. They come in Silver, Copper, Gold and antiqued finishes. There are so many ways you can use these!
Resin Color Film is my favorite way to color resin, because...
- it stays just where you want it so you have total control
- it makes the whole resin piece look colored even though it's just a thin layer
- you can layer elements over it without coloring them
- it will never bleed or run, bleed, or fade in resin like other films
Step 1: Select the sheet colors you want to use, then cut circles of Resin Color Film to fit behind each of the Hoops - they don't have to be perfectly cut as the hoops will hide the edges. Cut the middle out of each circle where the next smallest hoop will be, so that colors don't overlap.
Step 2: Figure out how you want to arrange your rings, here are the 2 options I considered. The first is more of a rosette design, the second looks more mod to me:
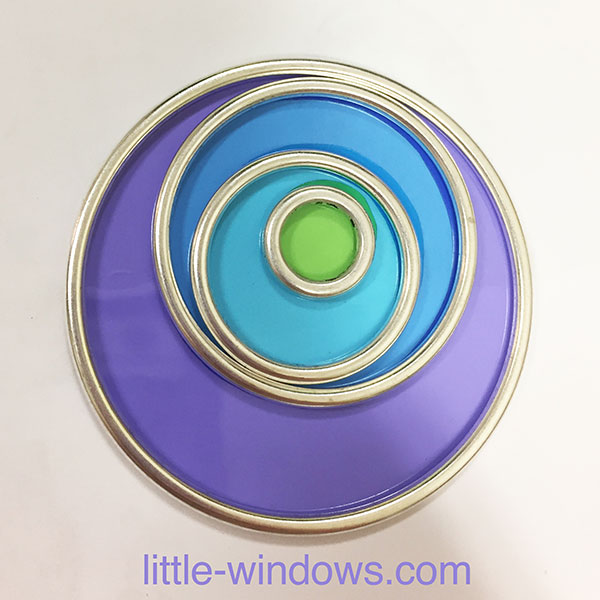

Step 3: Use the flat back of our Silicone Doming Tray as an easy-release surface. Arrange the colors and hoops however you'd like. As you can see, the circles don't need to be completely perfect as the metal hoops will cover the edges where they meet.
The resin shouldn't seep under the edge of this outer ring because...
1. These metal rings are quite heavy and nicely shaped.
2. The silicone on the doming tray adheres nicely to the ring and the film, keeping it in place.
3. You'll be using thickened Brilliant Resin, so the chances of leak-under are slim.

Step 4: Place only the largest outer hoop on top of your Resin Color Film Shapes. Mix a batch of Brilliant Resin and allow it to set up for 30 minutes to thicken up, then slowly pour resin inside of the hoop filling about half-way up the hoop.
The dark parts you see show where resin leaked behind the film, but it doesn't matter in this case because you'll be doming the back, just try to make sure the resin doesn't escape from the metal hoop.
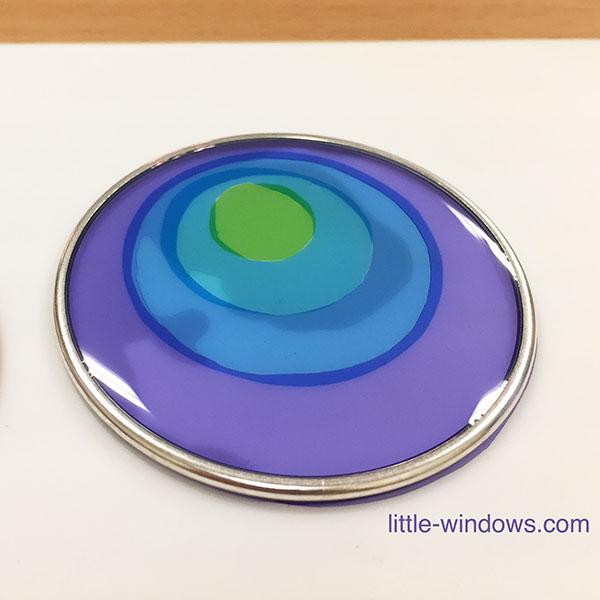
Step 5: Allow resin to set for another 30-60 minutes in the rings until it's nice and thick. Then place the inner hoops, lining them up with your circles of Resin Color Film.
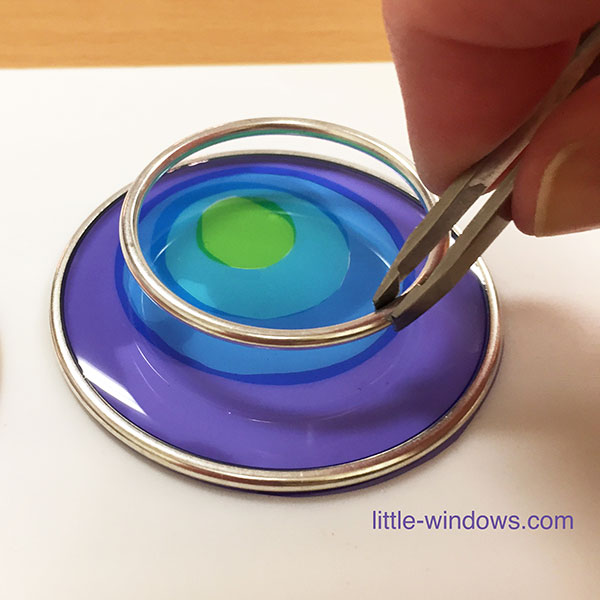
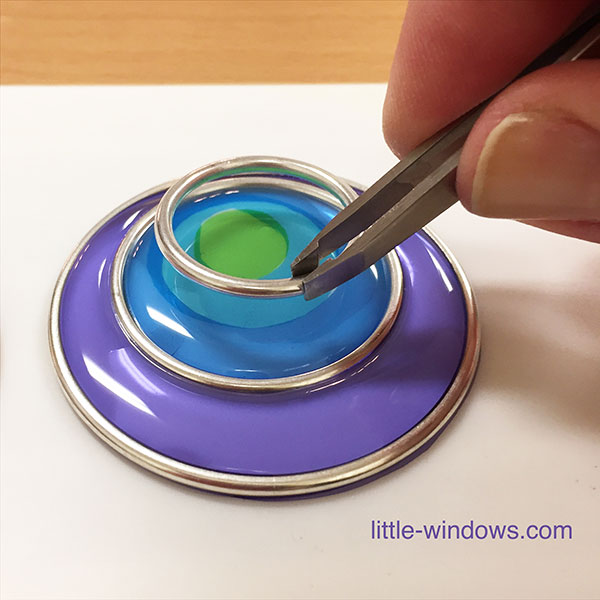
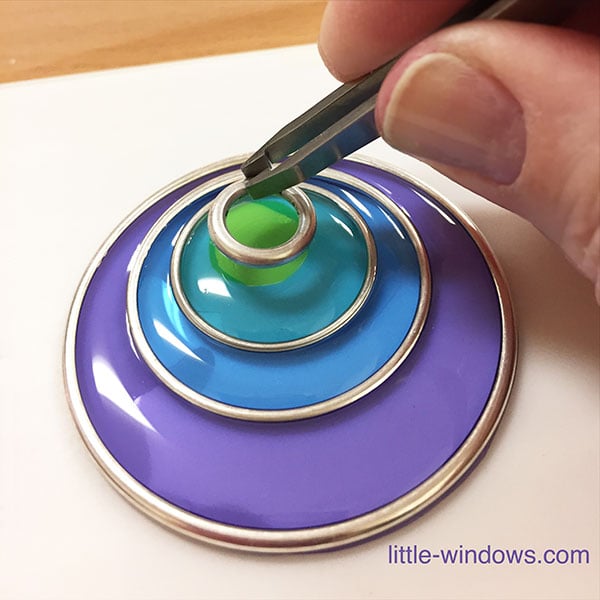
If you've allowed your resin to thicken enough, these rings will push the resin aside as you insert them, causing a ripple or rounding effect within each colored section. This extra dimension brings an eye-catching shine to your pieces.
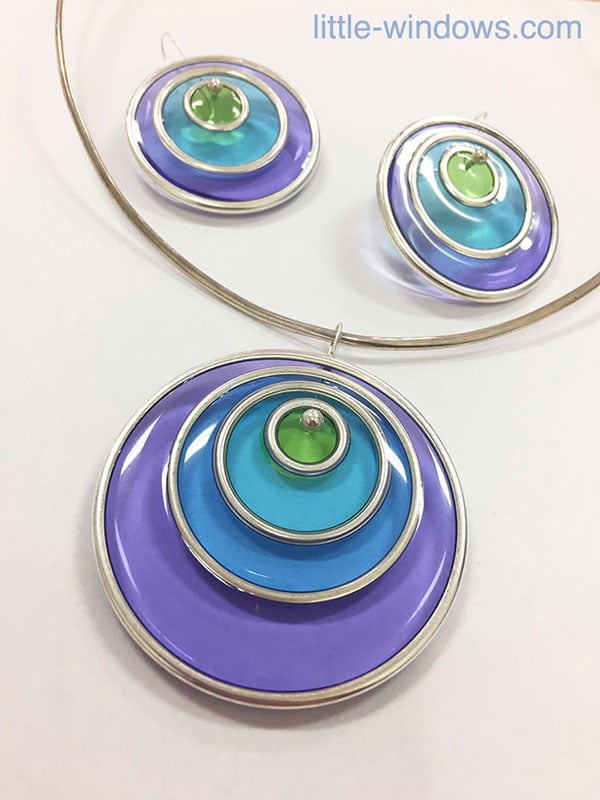
For the matching earrings, I only used 3 colors and hoops as I wanted them to be smaller than the pendant.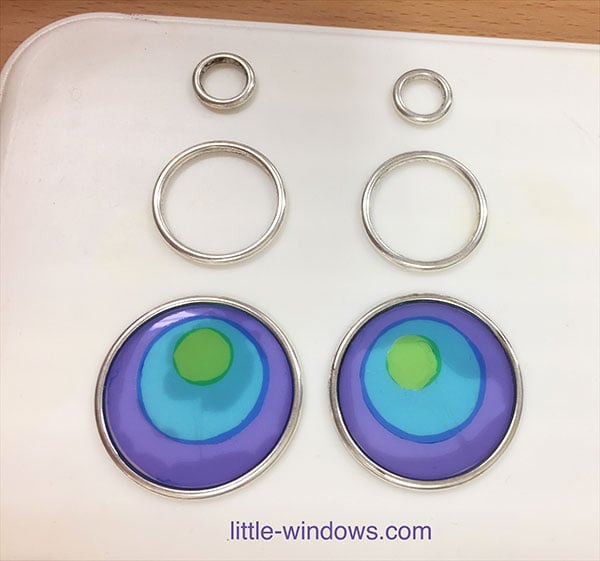
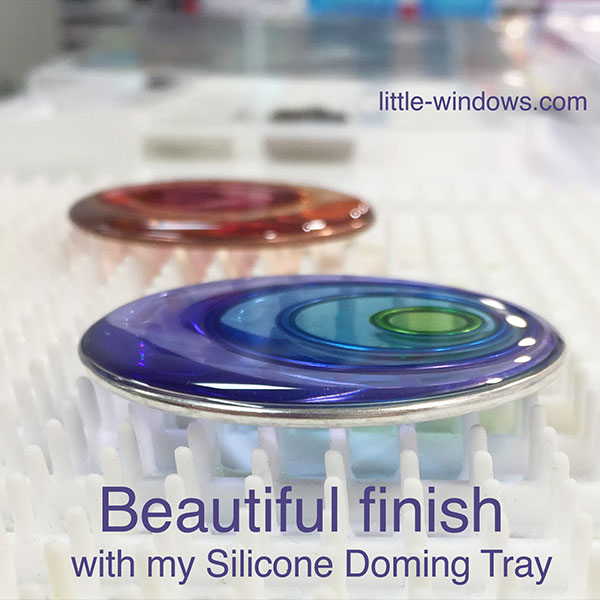
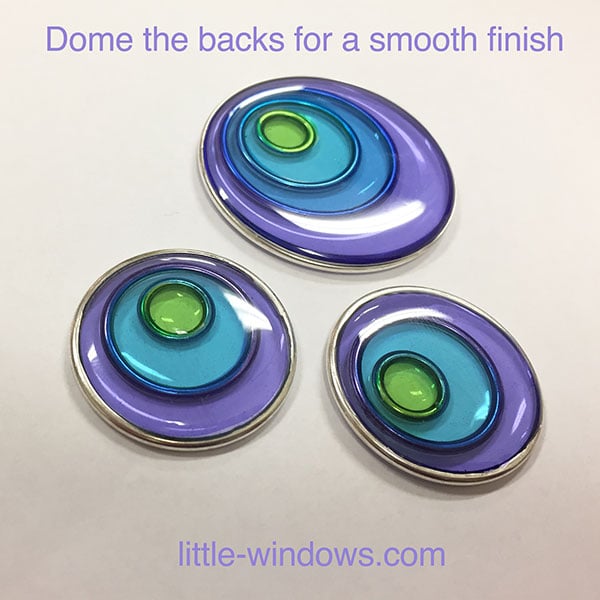
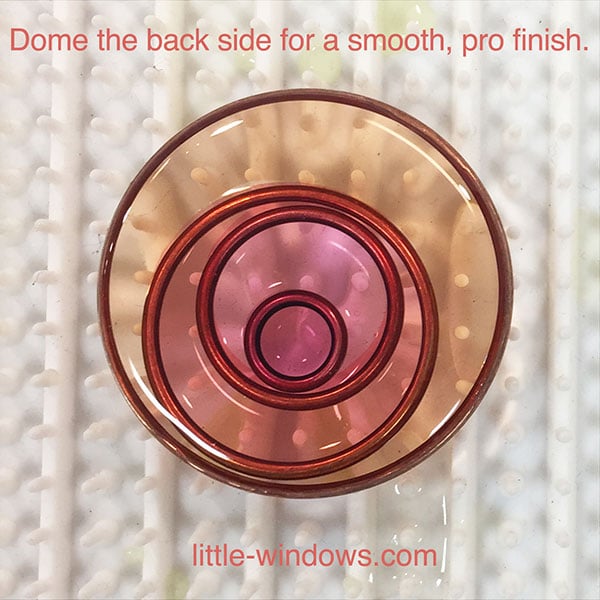
Step 6: Allow to set up for at least 24 hours (better if you have 2-3 days, so it can really harden). Then flip over your pieces and dome the back side with Brilliant Resin. Allow to set up.
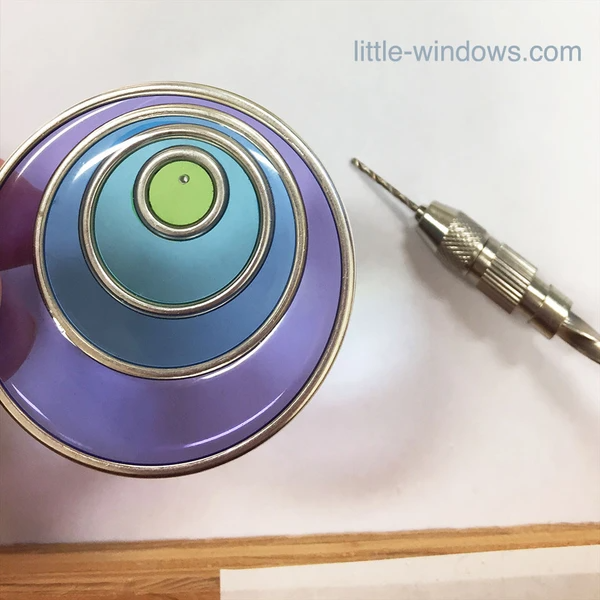
Step 7: Place pieces on a hard wood surface and use your Spring Drill to make holes for your jewelry findings.
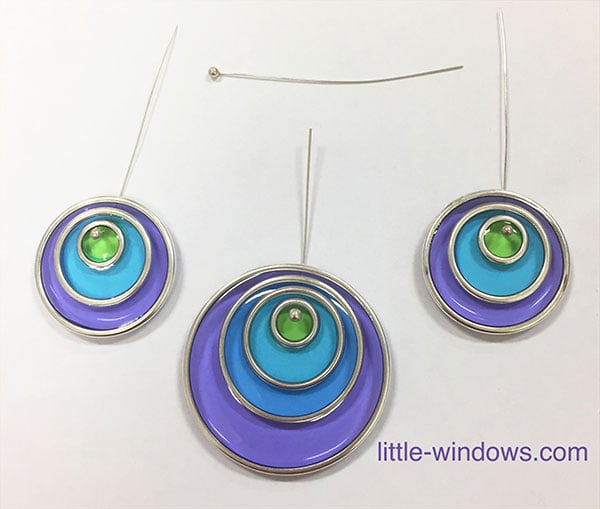
Step 8: I used 2-1/2" long sterling silver head pins in these, fed them through and bent them up at the back.
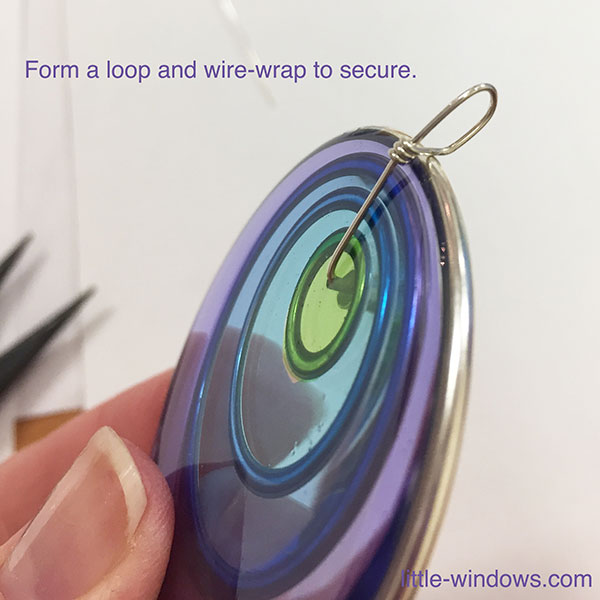
For the Pendant I bent up the wire, made a loop, and used my pliers to hold the loop while I wrapped the wire around just above the outer ring. I trimmed the extra wire and tucked the end in so it wouldn't poke me.
For the earrings I simply bent the pins up and then wrapped the wire around a pencil at a distance that let them hang comfortably from my ears.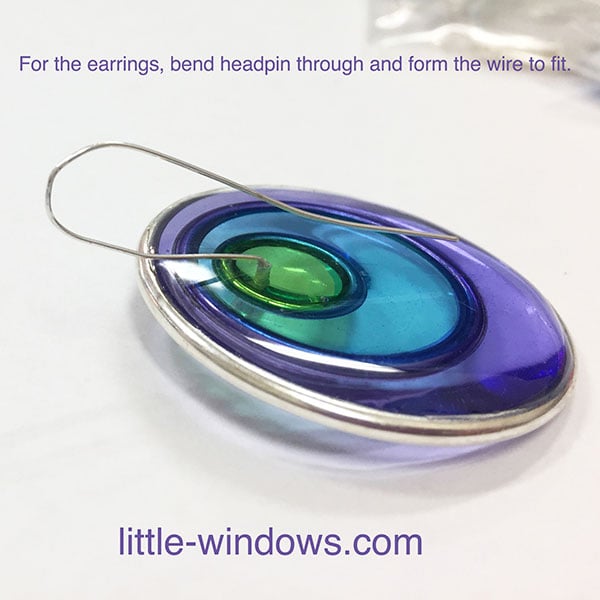
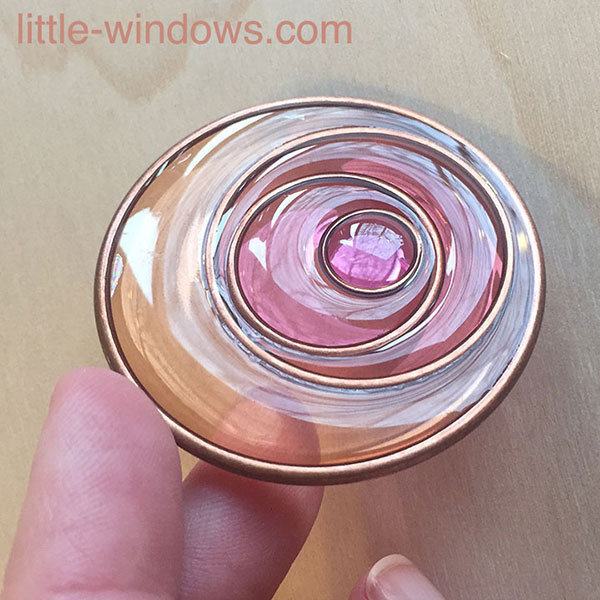
Here's a variation using other colors in the Resin Color Film - Pale Tints Pack. I used Pale Apricot, Pale Peach, Pale Pink, and Pale Lilac, with Copper Open Frame Hoops, arranged like a stylized rose.
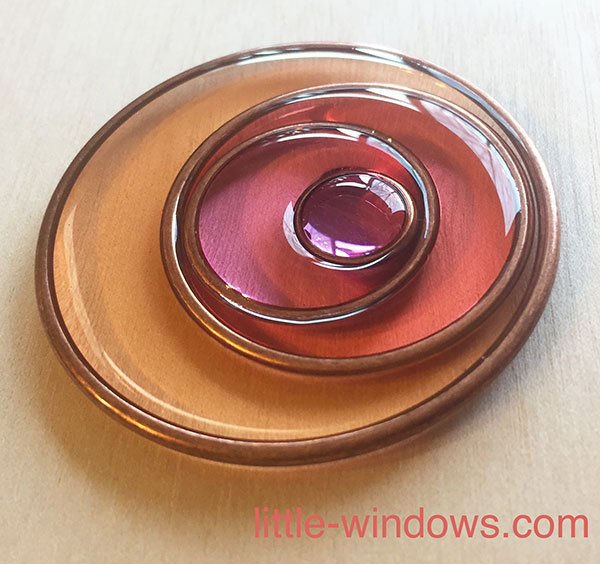
You can see how the "Ripple Effect" catches the light.
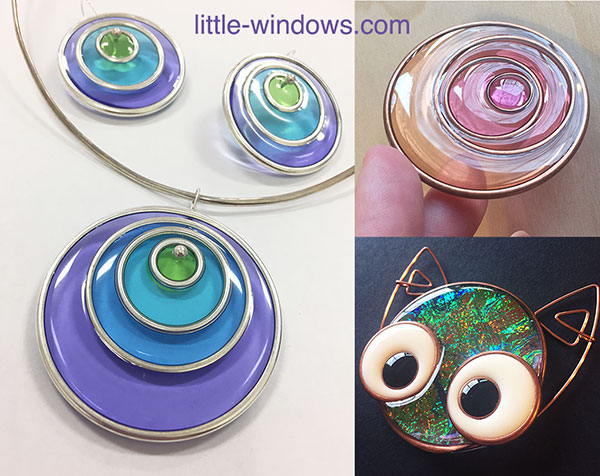
MORE IDEAS using the same awesome products:

