

You'll also need
We also offer packs of single color packs of Resin Color Film, if you're interested email fran@little-windows.com
- Depending on what you'd like to make you'll need more supplies, for me this was a belt, a jar lid, and gold spray paint
- Aluminum foil
- Sharp scissors
- Paper towels
On our Amazon Recommendations Page you'll find the things we love but don't sell, like alcohol inks, curved scissors, great printers, and more fun stuff.
Please save, share, and follow us: YouTube Channel Pinterest Facebook Instagram
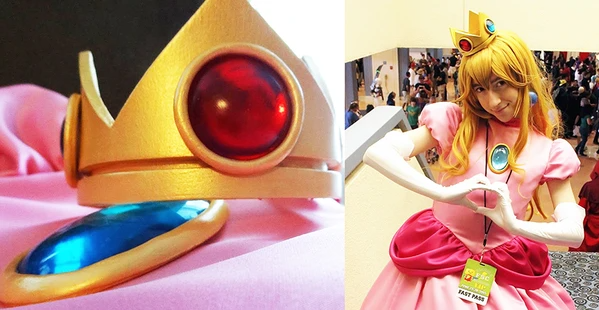
Inspired by Amazing Maker Vicky Fisher, I'm so excited to explore cosplay applications! Here are some accessories she's made for her beautiful daughter:
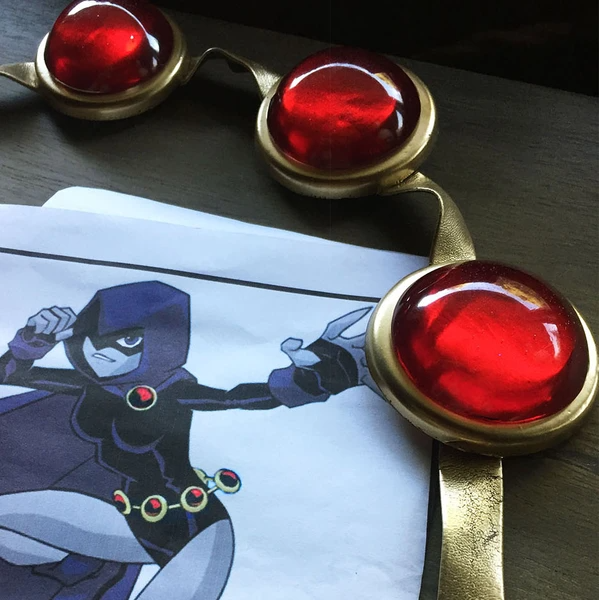
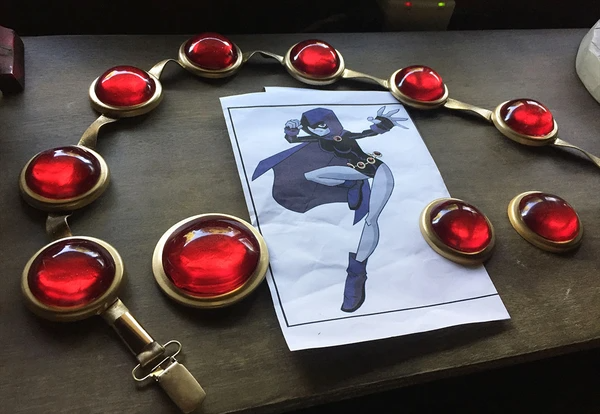
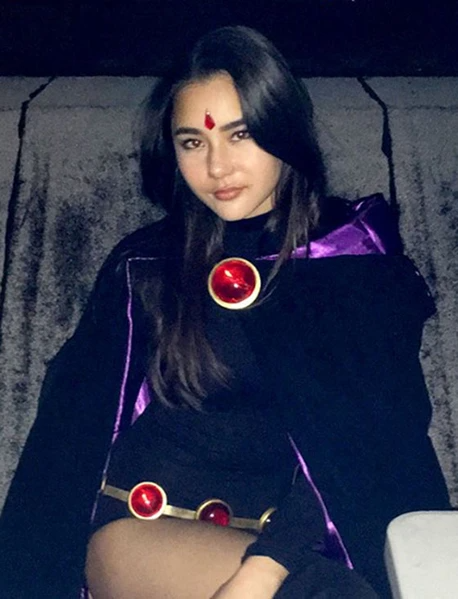
My daughter asked for help to create her Halloween costume this year, Raven from Teen Titans. She pulled together the costume, and I made the accessories - belt, cape pin, hand amulets and upside-down diamond-shaped bindis. I think they came out pretty amazing so I thought I'd share in case you want to try something similar:
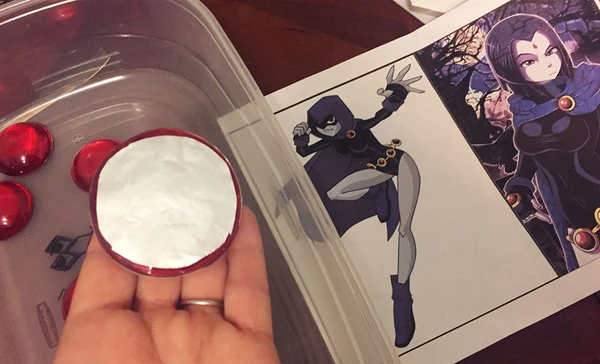
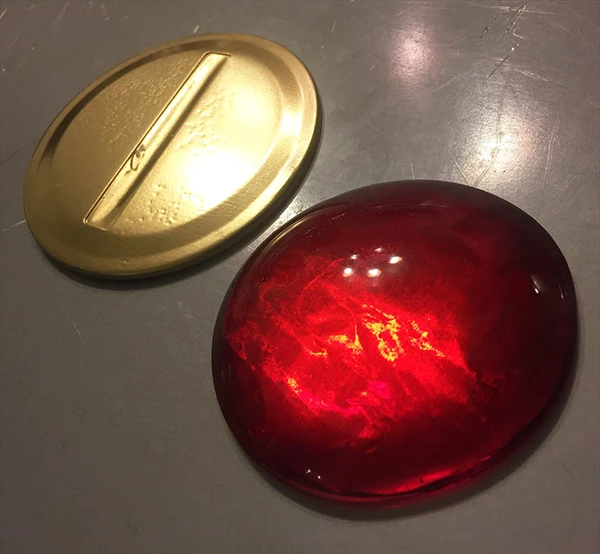
For the gems: Cast Brilliant Resin in our Silicone Cabochons Mold, mounted Resin Color Film in Jewel Red on the back of each, followed by a cut circle of aluminum foil applied with a thin coat of resin for optimal reflection.
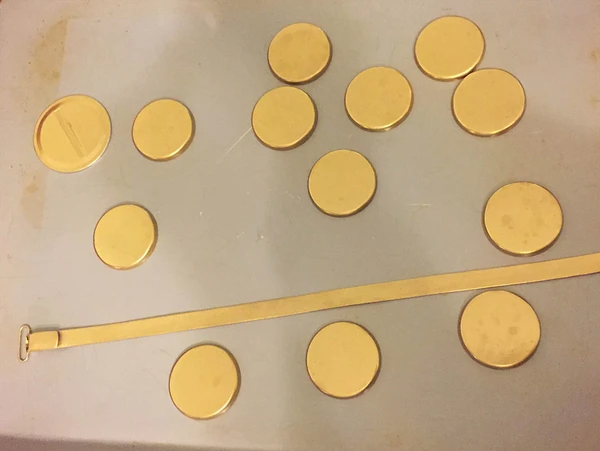
For the gold belt: You can buy a gold belt, but I just got some fake leather and a clip from JoAnn Fabrics and made one on the cheap. Cast thin round shapes to back gems in our Large Circles Molds (psst - you can customize our Large or Hearts mold sets to get multiples of the shape you want!) I mixed gold powder into the resin thinking the resulting cast would be shiny - nope, just cast them clear to keep it simple.
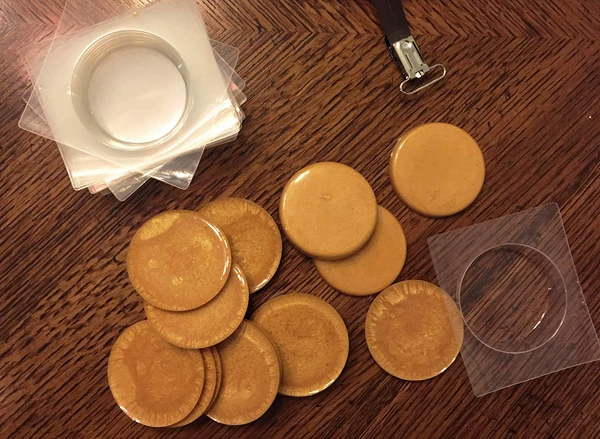
So I spray painted these cast Brilliant Resin pieces and the belt to get the look I wanted.
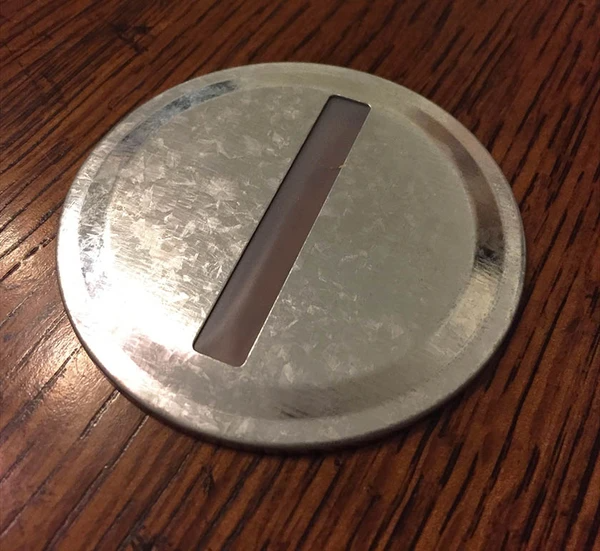
For the Cloak Pin: I made a larger jewel and needed a larger lightweight piece in gold to back it. I found this perfectly-sided canning top at JoAnn Fabrics (spray painted above). I didn't need the slit in the middle, but it would be covered with the jewel so it didn't matter. I applied 2 pin-backs to this piece to make it really secure.
You could attach these pieces all together in many different ways, but since I had Brilliant Resin on-hand, I embedded the belt and the pins into thickened resin on the backs of each piece. I waited about 1 hour before pushing the belt and pin-backs into the resin, but it was 104F here, so if it's a normal temp where you're working, you may want to wait a bit longer to let your resin get nice and thick.
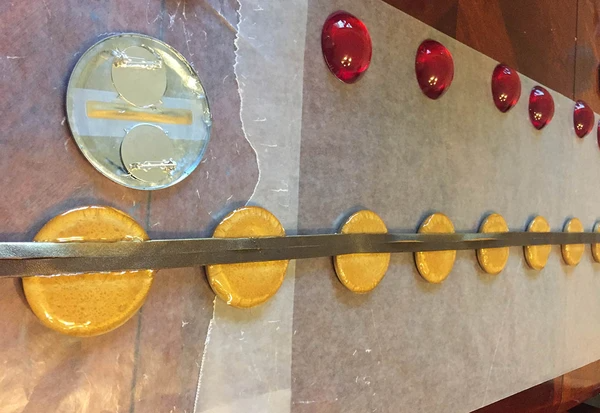
I placed the belt in the top half of each gem-back instead of in the center, so the gems wouldn't flip over while the belt is worn. The finished pieces have a nice weight to them.

Finally, I attached the gems to the golden belt circles using Gorilla Glue Clear.
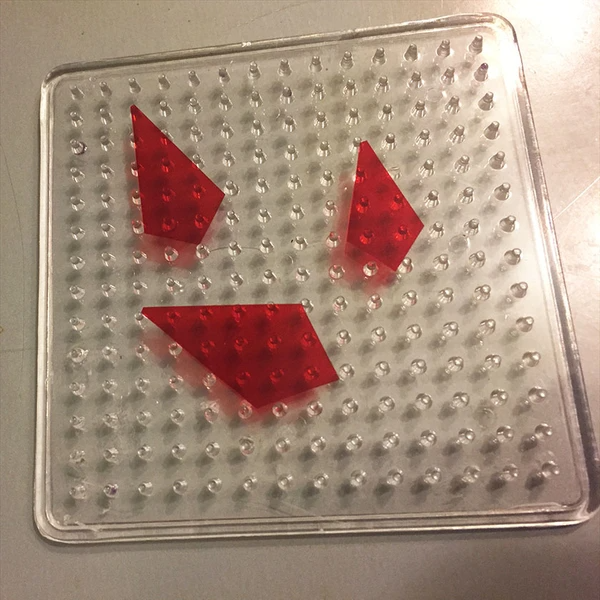
For the Bindi: I made a few sizes (not having her head handy), simply cut shapes out of our Resin Color Film, domed them with Brilliant Resin, and once they were set up I painted the back with silver nail polish. You could do this on the larger pieces too but they won't reflect as well. She applied it with eyelash glue.
Finished costume (minus the wig, saving that for party night). :)
MORE IDEAS using the same awesome products:


