You'll also need
- Metallic Acrylic Paints - CLICK HERE to see some I recommend
- A foam or bristle brush to apply paint
- Optional: Metal charms
- Paper Towels
Please save, share, and follow us:
YouTube Channel Pinterest Facebook Instagram
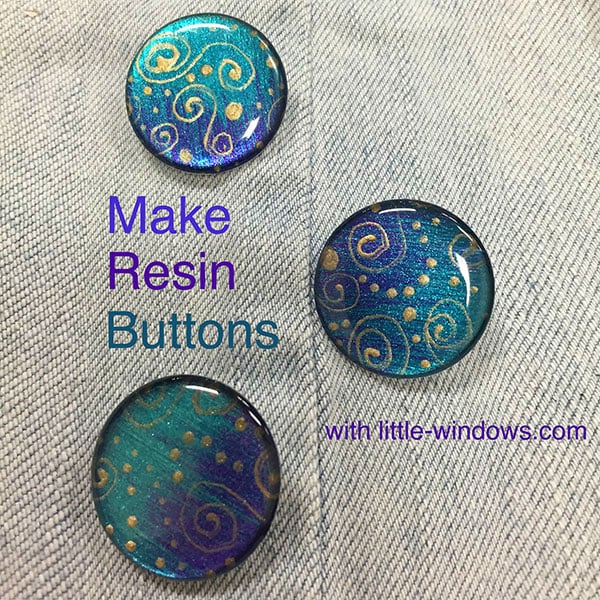
On these ones I drew some swirlies and dots in gold paint/nail polish.
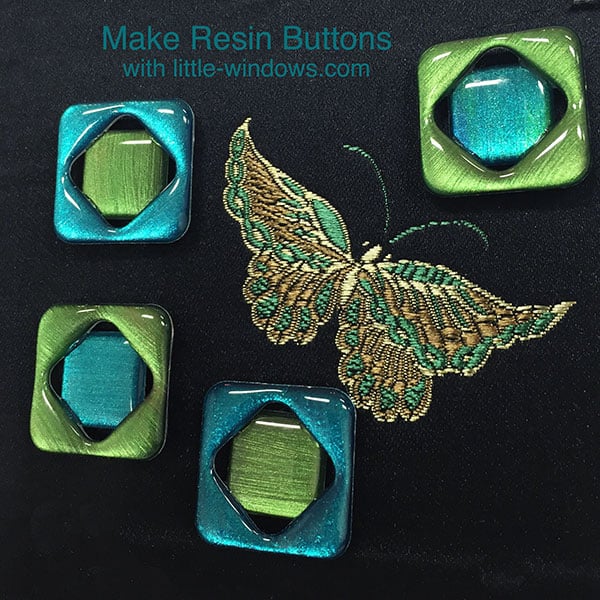
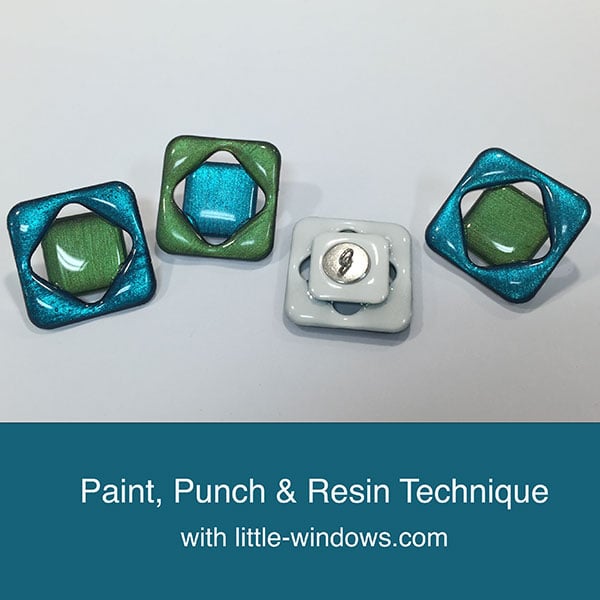
These next ones required 3 resin stages. First I punched out Medium Square shapes, then punched small square shapes out of the middle of each. I then domed the fronts of the larger pieces and the backs of the smaller pieces, inserting the button shanks in the back of the small ones.
I let that set up, then flipped them over and domed the fronts of the small shapes and let that set up. Then, I domed the backs of the large shapes, waited about 1-1/2 - 2 hours, then pushed the smaller punched shapes into the setting resin, using the button shank as a handle.
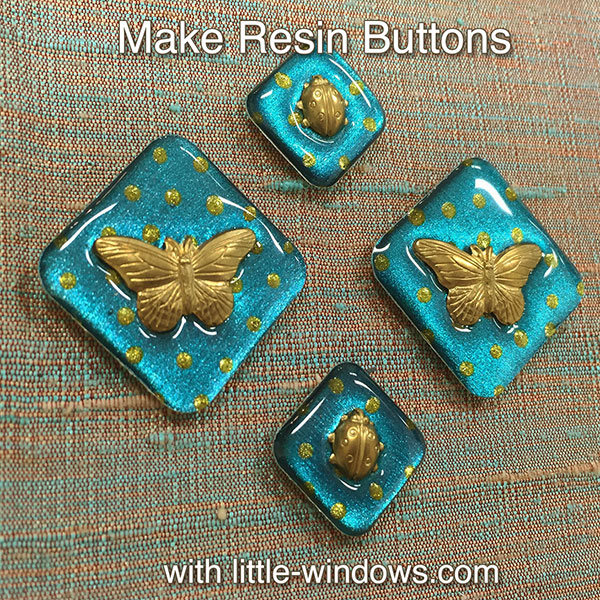
These ones the paper was painted teal metallic, then added gold dots. I attached the button back to the paper with a drop of ZapAGap Super Glue, then domed the backs and allowed to set up for at least 12 hours.
Then I flipped over and domed the fronts. I waited about 1-1/2-2 hours then pressed the charms in the center of each. The resin should be firming up so it pushes out from the charm making a ripple effect that catches the light, and forms a secure bond with the charm. You can test this by touching the center with a pin to see if it flattens easily or retains a shape. If the resin flows back around your charm and flattens out, you didn't wait long enough before inserting your charm.