AdventureTime (or whatever you're obsessed with) Resin Bracelet
What you'll need to make this:
- Double-Sided Silicone Resin Mold Set with accessories
$24.00
- Resin 12 oz. Set (deals on multiples)
$36.00
- Clear Photo Film
$10.00
(selections can be changed at checkout)

You'll also need

- Digital files of characters, or stickers.   

Don't sell things using copyrighted images unless you have permission to do so.

- Clear packing tape (alternative to Clear Photo Film above, see options below to decide)

- A tiny bit of super fine crystallina glitter or Super Pearly Powder - if you want to add a bit of sparkle to your bangle like I did

- Sharp scissors

- Paper Towels


Each of our Double-Sided Molds comes with a cropping template, clear dust covers, a thorough Maker's Guide, and wet-dry sandpaper to get rid of any sharp edges or bumps.


Please save, share, and follow us:

YouTube Channel     Pinterest    Facebook   Instagram


How-To:
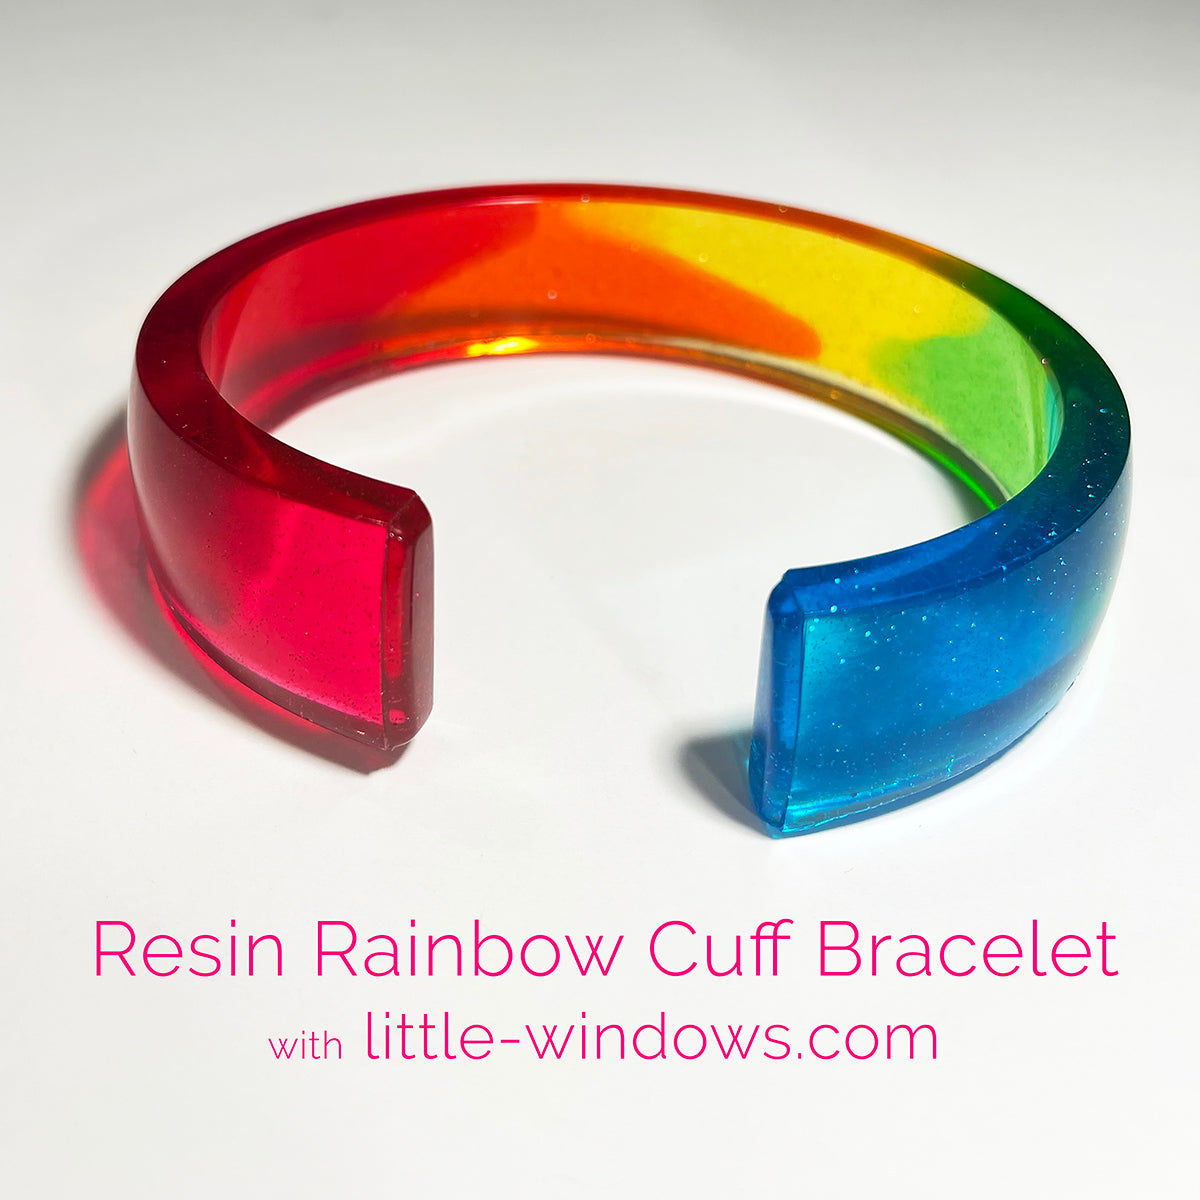
My kids keep stealing this one.  I mixed a tiny bit of super-fine glitter in my resin because Princess Bubblegum asked nicely. 
This piece can be made following Options #1 or #2 below.

If you plan to work with digital images, the video above walks you through 3 different ways to resize photos to fit these bangle molds:
1) Using the little-windows.com online Photo Cropper
2) Using MS Word or Google Docs  
3) Using Photoshop 
The tutorial at the bottom of this post has a wider range of project ideas and demos, from bangles to ornaments to trinket dishes.   

Here is a quickie video for projects like this that'll give you the basic idea of how to make them:


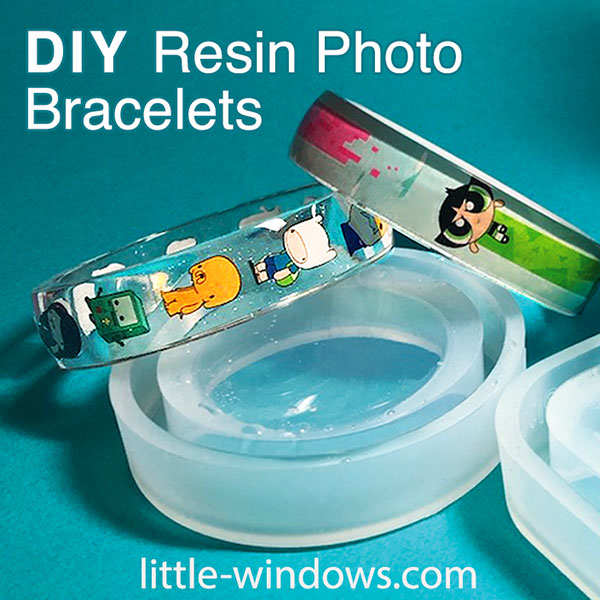
I'll describe 3 ways to create the character strip.  Once you have this, the resin casting part will be the same for all 3:

Strip Option 1: If you have stickers you want to use, cut a 5/8" strip of Clear Photo Film or clear packing tape to fit your bangle mold (our molds include a guide with a sizing strip just for this) and arrange the stickers.  Cut the strip to the right length based on the shape of mold you're using, and stick the ends together. Do a dry fit in the mold to make sure it's a good fit.

Strip Option 2:* If you have digital images you want to use, you can size them to fit on a 5/8" strip and print on Clear Photo Film.  The images will be clear, so you'll want to paint the backs of each character with white acrylic paint so the characters will appear as though they are floating in the resin once they are cast.

Strip Option 3:* If you have digital images you want to use, you can also size them to fit on a 5/8" strip and print on our Special Photo Paper for Resin.  The images will have a white background, so to make the characters appear as though they are floating in the resin once they are cast you can punch them out and arrange them on a 5/8" strip of clear packing tape.

* Both of these options follow the top tutorial.

Once you have your composed strips, mix a batch of Brilliant Resin following the volume guide that comes with our Double Sided Bangle Molds. Fill each bangle mold about 3/4 full, insert your photo strip, push it down with the Mixing Wand that comes with Brilliant Resin, then fill to the top of the mold.  Check for bubbles after 10 minutes and push down your strip if it has floated up. Repeat if necessary.

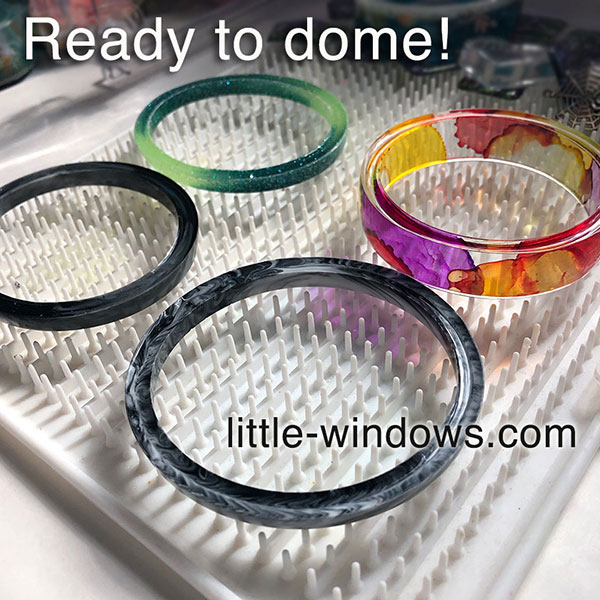
You'll be able to demold any time after 12 hours without fingerprinting.  If you've underfilled your mold, trim any uneven bits off and then dome up the top edge for a smooth, professional finish. You'll see a full demonstration in the video below.


Watch this tutorial for the full project and lots more ideas!


IDEAS+HOW-TO's
Want to learn more about a product, technique, type of project, or topic?
See more project ideas sorted by...
Choose an Effect/Technique
  • All Effects
  • 3-D
  • Bendy Resin
  • Bezels
  • Casting
  • Thin Coat/Varnishing
  • Dichroic/Color Shift
  • Doming
  • Doming-Up
  • Double-sided Doming
  • Flowers in Resin
  • Embedding Elements
  • Feathering/Swishing
  • Glow In The Dark
  • Ink Effects
  • Layering
  • Making Multiples
  • Marble Effect
  • Ocean Looks
  • Personalizing
  • Petri
  • Punch Projects
  • Resin On Fabrics
  • Resizing Images
  • Ripple Effect
  • Special Effects
  • Stamping
  • Stone Effects
  • Surface Finishes
  • Twisted Resin
  • Wire Work
Choose a Type/Form of Project
  • All Types
  • 3-D Projects
  • Bookmarks
  • Bracelets
  • Buttons
  • Cabochons (half-spheres)
  • Candle Votives
  • Charms
  • Coaster
  • Cosplay/Costumes
  • Decor
  • Dishes/Containers
  • Earrings
  • Fandom
  • Frames
  • Games
  • Hair Accessories
  • Heart Shaped Projects
  • ID Tags/Markers
  • Keychain
  • Knob/Pulls
  • Magnets
  • Memorabilia
  • Necklaces
  • Ornaments
  • Paperweight
  • Patriotic
  • Philatelic (stamps)
  • Photo Keepsakes
  • Pins
  • Prayer Beads
  • Resin Eyes
  • Rings
  • Sun Catchers
  • Zipper Pulls
Choose an Event, Theme, or Holiday
  • All Events
  • All Special Events
  • All Holiday
  • Pets
  • Ancestry/Family
  • Wedding
  • Anniversary
  • New Baby
  • Faith
  • In Memory of
  • Solidarity/Awareness
  • Game Day
  • New Year
  • Valentines
  • Easter
  • Mother's Day
  • Graduation
  • 4th of July
  • School Days
  • Halloween
  • Christmas
  • More Special Occasions
Materials you can put in Resin
  • All Materials
  • All Resin Colorants
  • All Organic Matter
  • Alcohol Ink
  • Acrylic Paint
  • Ashes
  • Beads
  • Black and White Looks
  • Candy
  • Clear Photo Film
  • Color-Shift
  • Crystals
  • Dichro-ISH Films
  • Dried Flowers
  • Fabric/Fiber
  • Glitter
  • Glow In The Dark
  • Hair
  • Liquid Colorants
  • Nail Polish
  • MakeUp
  • Metal
  • Mica Powder
  • Mixed Media
  • Papers
  • Photos
  • Plastics
  • Polymer Clay
  • Postage Stamps
  • Resin Color Film
  • Sand / Stones
  • Sequins
  • Shells
  • Shrink Films
  • Stickers
  • Washi Tape
  • Wire
  • Wood